cub cadet lt1045 manual

The Cub Cadet LT1045 is a hydrostatic lawn tractor designed for efficient mowing‚ featuring a Kohler engine and 18-inch turning radius. The operator’s manual provides essential guidelines for safe operation‚ assembly‚ and maintenance‚ ensuring optimal performance and longevity of the equipment.

1.1 Overview of the Cub Cadet LT1045 Model

The Cub Cadet LT1045 is a hydrostatic lawn tractor designed for efficient mowing and durability. Equipped with a single-cylinder Kohler engine‚ it is ideal for large lawns and uneven terrain. Its 18-inch turning radius ensures precise maneuverability‚ making it suitable for diverse landscaping needs. The tractor features a robust build and user-friendly controls‚ catering to both residential and small commercial applications. The model is part of the Cub Cadet 1000 series‚ known for reliability and performance. A detailed operator’s manual is provided to guide users through setup‚ operation‚ and maintenance‚ ensuring optimal functionality and longevity of the equipment. This manual is essential for understanding the tractor’s capabilities and proper usage.

1.2 Importance of the Operator’s Manual

The operator’s manual for the Cub Cadet LT1045 is a crucial resource for safe and effective operation. It provides detailed instructions on assembly‚ setup‚ and routine maintenance‚ ensuring users can maximize the tractor’s performance. The manual outlines essential safety precautions‚ such as slope operation guidelines and warning labels‚ to prevent accidents. Additionally‚ it serves as a troubleshooting guide‚ helping users identify and resolve common issues. By following the manual’s instructions‚ users can extend the lifespan of their equipment and ensure compliance with manufacturer recommendations; Accessing the manual is straightforward‚ as it can be downloaded for free online‚ making it easily accessible for all users to reference whenever needed.

1.3 Where to Find the Manual

The Cub Cadet LT1045 operator’s manual can be easily accessed online. Users can visit the official Cub Cadet website and navigate to the support section‚ where they can download the manual for free by entering their model number. Additionally‚ the manual is available on platforms like ManualsLib and Scribd‚ offering convenient access. For those who prefer physical copies‚ local Cub Cadet dealers can provide printed manuals upon request. The manual is also included within the product packaging at the time of purchase. Ensuring access to this resource is straightforward‚ allowing users to reference critical information whenever needed.

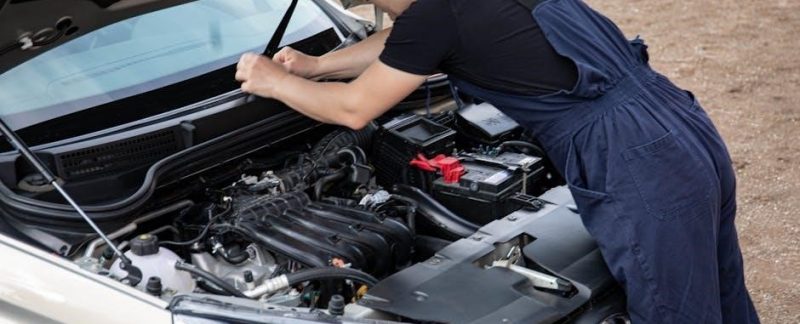
Safety Information and Precautions

Safety is paramount when operating the Cub Cadet LT1045. This section outlines essential precautions‚ including general safety rules‚ slope operation guidelines‚ and warning labels to ensure safe usage.

2.1 General Safety Rules

Always follow general safety rules when operating the Cub Cadet LT1045. Ensure the safety interlock system is functioning correctly to prevent accidental start-ups. Wear protective gear‚ including gloves and safety glasses. Keep loose clothing and long hair tied back to avoid entanglements. Never allow children or pets near the tractor while it’s in operation. Be cautious on uneven terrain and avoid mowing in reverse unless necessary. Never modify the tractor or disable safety features‚ as this can lead to accidents. Keep the tractor in good working condition‚ and refer to the manual for specific safety guidelines tailored to your model. Adhere to these rules to ensure safe and effective operation.

2.2 Slope Operation Guidelines

When operating the Cub Cadet LT1045 on slopes‚ exercise extreme caution to prevent accidents. Always assess the steepness of the slope before mowing. Mow up and down slopes‚ never across‚ to maintain traction and stability. Use a low gear setting to maintain control and avoid sudden acceleration. Keep the mower deck at the recommended height to ensure even cutting and prevent scalping the lawn. Avoid mowing on wet or uneven terrain‚ as this can increase the risk of slipping or losing control. If the slope is too steep‚ consider alternative methods or seek assistance. Following these guidelines ensures safe and effective mowing on sloped areas.

2.3 Warning Labels and Symbols

Warning labels and symbols on the Cub Cadet LT1045 are critical for ensuring safe operation. These labels are strategically placed to alert operators of potential hazards. Common symbols include warnings for moving parts‚ hot surfaces‚ and proper braking procedures. Always read and understand these labels before operating the tractor. They provide essential information to prevent accidents and protect both the user and the machine. Familiarize yourself with the meanings of all symbols to ensure compliance with safety guidelines. Ignoring these warnings can lead to serious injury or damage to the equipment. Regularly inspect labels for clarity and replace any worn or damaged ones to maintain visibility and safety standards.

Product Features and Specifications

The Cub Cadet LT1045 features a powerful Kohler engine‚ versatile mowing deck options‚ and an 18-inch turning radius‚ making it ideal for large and uneven lawns.

3.1 Engine Specifications (Kohler Engine)

The Cub Cadet LT1045 is equipped with a reliable single-cylinder Kohler engine‚ designed for consistent performance and efficiency. Known for its durability‚ the Kohler engine provides smooth power delivery‚ making it suitable for demanding mowing tasks. The engine’s compact design ensures easy maintenance and optimal fuel efficiency. With a focus on reliability‚ the Kohler engine is a key feature that enhances the overall performance of the LT1045‚ ensuring it can handle large lawns and uneven terrain with ease. This engine model is widely trusted for its robust construction and ability to deliver consistent results under various operating conditions.

3.2 Mower Deck and Cutting Options

The Cub Cadet LT1045 features a durable mower deck designed for versatile cutting performance. With adjustable height settings‚ the deck allows for precise cutting at various lengths‚ ensuring a clean finish. The mower deck is constructed with robust materials to withstand regular use and challenging mowing conditions. It also offers convenient features such as mulching capabilities and side discharge options‚ providing flexibility for different cutting preferences. The deck’s design ensures even cutting across the entire width‚ reducing the need for multiple passes. Additionally‚ the LT1045 includes a deck wash system for easy maintenance and a gauge wheel for consistent cutting height on uneven terrain‚ making it a reliable choice for maintaining large lawns efficiently.

3.4 Steering and Turning Radius

The Cub Cadet LT1045 offers a tight 18-inch turning radius‚ enabling precise maneuverability around obstacles and in tight spaces. Its hydrostatic transmission allows for smooth‚ variable speed control without the need for manual shifting‚ enhancing ease of operation. The responsive steering system provides excellent control‚ making it ideal for navigating uneven terrain and large lawns. The compact turning radius reduces the need for multiple passes‚ saving time and effort. This feature‚ combined with its robust design‚ ensures efficient mowing and minimal turf damage. The LT1045’s steering and turning capabilities make it a versatile and user-friendly choice for maintaining diverse lawn conditions with precision and ease.

Assembly and Setup

Follow the manual’s guidelines for proper assembly‚ including attaching accessories and adjusting components. Ensure all parts are securely fitted and test the tractor post-assembly to confirm functionality.

4.1 Pre-Assembly Checks

Before assembling your Cub Cadet LT1045‚ perform a thorough inspection to ensure all components are included and undamaged. Verify that the tractor‚ mower deck‚ and accessories match the manual’s specifications. Check for any shipping damage and report issues promptly. Familiarize yourself with the safety features‚ such as the parking brake and safety interlock system‚ to ensure they function correctly. Review the manual’s pre-assembly checklist to confirm proper tire pressure‚ oil levels‚ and fluid capacities. Ensure all bolts and fasteners are tightened securely‚ and test the steering and braking systems before initial startup. This step ensures a safe and efficient assembly process.

4.2 Initial Setup and Adjustments

After unboxing and inspecting your Cub Cadet LT1045‚ begin by adjusting the seat and steering to your comfort; Ensure the parking brake is engaged and familiarize yourself with the controls. Set the tire pressure according to the manual’s specifications and check the oil level. Adjust the throttle and choke settings for proper engine performance. Test the hydrostatic transmission by slowly releasing the brake and moving forward. Ensure the mower deck is properly engaged and disengaged to avoid accidental startups. Finally‚ verify that all safety features‚ such as the interlock system‚ are functioning correctly. These steps ensure a smooth and safe initial operation of your tractor.

Operating the Cub Cadet LT1045

Ensure smooth operation by following guidelines in the manual. Engage the hydrostatic transmission gently‚ monitor speed‚ and use safety features like the interlock system. Always maintain control and follow terrain-specific instructions for optimal performance.

5.1 Starting and Stopping the Engine

Starting the Cub Cadet LT1045 involves engaging the safety interlock system‚ which ensures the parking brake is on before the engine can start. Move the throttle to the choke position‚ turn the ignition key‚ and allow the engine to warm up. For stopping‚ gradually reduce speed‚ move the throttle to idle‚ and turn the ignition off. Always engage the parking brake after stopping. The manual emphasizes these steps to ensure safe and efficient operation‚ preventing accidental startups and maintaining control of the tractor at all times. Adhering to these procedures helps prolong the lifespan of the engine and ensures user safety.

5.2 Basic Mowing Operations

Before mowing‚ ensure the mower deck is properly adjusted and engaged. Begin by moving the tractor at a steady pace‚ keeping the mowing deck 1-3 inches above the ground for even cutting. Adjust the deck height based on grass length‚ and overlap each pass slightly to avoid missing spots. For optimal results‚ mow in a pattern‚ turning at the end of each row. Avoid sudden turns or stops‚ as this can damage the lawn or the tractor. Regularly check for debris and ensure the mower deck is clear of blockages. Proper mowing techniques help maintain a healthy lawn and extend the lifespan of the Cub Cadet LT1045. Always refer to the manual for specific guidance on mowing different terrain types.

5.3 Special Operating Conditions

For special operating conditions‚ such as mowing uphill or on uneven terrain‚ maintain a reduced speed to ensure stability. Avoid mowing steep slopes where the tractor could tip. When operating on wet grass‚ reduce speed and raise the mower deck to prevent slipping or clogging. Tight turns should be avoided to maintain control and prevent damage to the lawn. Always engage the mower deck at a slow speed and disengage it before reversing. For dense or tall grass‚ raise the deck height and mow in multiple passes. The Cub Cadet LT1045’s hydrostatic transmission allows smooth control in challenging conditions. Refer to the manual for specific guidelines on operating in unique or difficult environments to ensure safety and performance.

Maintenance and Servicing

Regular maintenance ensures optimal performance of the Cub Cadet LT1045. Schedule routine checks‚ oil changes‚ and tire pressure adjustments. Prepare for winter storage to protect the engine and components.

6.1 Routine Maintenance Schedule

To ensure the Cub Cadet LT1045 operates efficiently‚ follow a routine maintenance schedule. Every 50 hours of use‚ change the engine oil and filter. Check and adjust tire pressure monthly‚ and inspect the mower deck for damage or wear. Sharpen the blades regularly to maintain cutting performance. Clean the air filter and replace it as needed. Lubricate moving parts and inspect belts for cracks or fraying. Before winter storage‚ drain the fuel tank and prepare the engine for hibernation. Always refer to the manual for specific instructions and timelines to keep your tractor in optimal condition and extend its lifespan.

6.2 Oil and Filter Changes

Regular oil and filter changes are crucial for maintaining the Cub Cadet LT1045’s performance; Change the oil every 50 hours of operation or at the start of each mowing season. Use a high-quality 10W-30 or 10W-40 engine oil suitable for your climate. Locate the oil drain plug under the tractor and allow the oil to drain completely before replacing it. Install a new oil filter securely‚ ensuring it’s tightened by hand. Dispose of used oil and filters responsibly. Always refer to the manual for specific instructions and recommendations. Using genuine Cub Cadet parts ensures compatibility and maintains your tractor’s warranty. Proper oil maintenance prevents engine damage and extends the lifespan of your equipment.

6.3 Tire Pressure and Adjustments

Proper tire pressure is essential for optimal performance and stability of the Cub Cadet LT1045. Check tire pressure when the tires are cold‚ as heat from operation can affect accuracy. Refer to the operator’s manual for the recommended pressure‚ typically between 10-15 PSI for the front tires and 15-20 PSI for the rear tires. Adjust tire pressure based on the terrain and load to ensure even weight distribution. Over-inflation can lead to poor traction‚ while under-inflation may reduce stability. Use a reliable tire pressure gauge and adjust gradually. Always maintain the recommended pressure to prevent uneven cutting and ensure safe operation‚ especially on slopes or uneven ground. Proper tire pressure also enhances the mower’s maneuverability and overall efficiency.

6.4 Winter Storage and Preparation

Proper winter storage ensures your Cub Cadet LT1045 remains in excellent condition. Drain the fuel tank or add a fuel stabilizer to prevent degradation. Change the engine oil and filter to protect against contaminants. Charge the battery and store it in a cool‚ dry place. Check and adjust tire pressure to the recommended level to avoid cracking. Sharpen the mower blades and apply a rust-inhibiting coating. Disconnect the spark plug for safety. Store the tractor in a clean‚ dry environment‚ away from direct sunlight and moisture; Follow these steps to maintain performance and longevity‚ ensuring it’s ready for the next mowing season.

Troubleshooting Common Issues

Identify symptoms‚ check for common problems like engine not starting‚ mower deck issues‚ or transmission malfunctions. Consult the manual for diagnostic steps and solutions to ensure safe and effective repairs.

7.1 Engine Not Starting

If the Cub Cadet LT1045 engine fails to start‚ first ensure the parking brake is engaged‚ as the safety interlock system prevents starting without it. Check the fuel level and ensure the fuel line and carburetor are clear of obstructions. Inspect the spark plug for cleanliness or wear and replace if necessary. A dirty or clogged air filter can also prevent starting‚ so clean or replace it as needed. Verify the oil level is within the recommended range‚ as insufficient oil can hinder engine operation. If the battery is dead‚ attempt to jump-start or recharge it. Consult the manual for detailed diagnostic steps and solutions to address the issue effectively.

7.2 Mower Deck Problems

Common issues with the Cub Cadet LT1045 mower deck include uneven cutting‚ blade damage‚ or failure to engage. First‚ check the blade for wear or damage and replace it if necessary. Ensure the mower deck is properly leveled‚ as an uneven deck can lead to poor cutting performance. If the deck fails to engage‚ inspect the deck belt for signs of wear‚ cracks‚ or misalignment. A damaged or loose belt may need replacement. Additionally‚ verify that the mower deck switch and electrical connections are functioning correctly. Consult the manual for specific troubleshooting steps‚ such as checking the fuse or hydraulic system‚ to resolve issues effectively and maintain optimal mowing performance.

7.3 Transmission and Hydrostatic Issues

Transmission and hydrostatic problems in the Cub Cadet LT1045 may include slow acceleration‚ difficulty shifting gears‚ or loss of power. Check the transmission fluid level and condition‚ as low or degraded fluid can cause poor performance. Inspect for any signs of leakage around the hydrostatic system. If the tractor struggles to move uphill or stalls frequently‚ the hydrostatic drive may need adjustment or repair. Consult the manual for guidance on fluid replacement and system checks. In severe cases‚ such as complete loss of hydrostatic function‚ professional servicing may be required to diagnose and fix internal components‚ ensuring the tractor operates smoothly and efficiently. Regular maintenance can help prevent these issues from arising.

Repair and Replacement

For the Cub Cadet LT1045‚ repair manuals and parts are readily available online. Common issues include worn blades‚ belts‚ or transmission parts. Always check the manual for guidance on DIY fixes or when professional assistance is required to ensure proper repair and maintain equipment longevity.

8.1 DIY Repair Tips

DIY repairs for the Cub Cadet LT1045 can save time and money‚ but always follow the operator’s manual for guidance. Common fixes include replacing worn mower blades‚ adjusting or replacing drive belts‚ and cleaning or replacing the air filter. For blade replacement‚ ensure the mower is turned off and the spark plug wire is disconnected for safety. Belt replacements may require adjusting tension according to specifications. Regular lubrication of moving parts and checking tire pressure can prevent premature wear. If encountering issues like uneven cutting‚ check blade balance and deck alignment. For more complex problems‚ such as hydrostatic transmission leaks or engine troubles‚ consult the service manual for step-by-step instructions. Always use genuine Cub Cadet parts for reliability. If unsure‚ consult a professional to avoid further damage.

8.2 When to Contact a Professional

While DIY repairs are feasible for minor issues‚ certain problems require professional expertise. If the engine fails to start despite proper troubleshooting‚ or if transmission issues arise‚ consult a certified technician. Complex repairs like hydrostatic transmission leaks‚ electrical system malfunctions‚ or significant engine damage should be handled by professionals. Additionally‚ if safety features like the interlock system fail‚ seek expert assistance immediately. Always refer to the operator’s manual for guidance‚ and contact Cub Cadet authorized service centers for reliable and warranty-compliant repairs. Professionals ensure proper diagnostics and prevent further damage‚ maintaining your tractor’s performance and safety standards.

The Cub Cadet LT1045 manual provides comprehensive guidance for safe operation‚ maintenance‚ and troubleshooting. Regular upkeep and professional assistance ensure optimal performance and longevity of the equipment.

9.1 Key Takeaways

The Cub Cadet LT1045 manual is a vital resource for understanding and maintaining your lawn tractor. It emphasizes safety‚ proper operation‚ and routine maintenance to ensure longevity. Key points include adhering to safety rules‚ performing regular oil changes‚ and checking tire pressure. The manual also highlights the importance of slope operation guidelines and warning labels. Troubleshooting sections help diagnose common issues‚ while maintenance schedules keep the tractor running smoothly. For complex repairs‚ consulting a professional is recommended. By following the manual’s instructions‚ users can optimize performance and extend the life of their Cub Cadet LT1045. Always refer to the manual for specific instructions and guidelines.

9.2 Final Thoughts on the Cub Cadet LT1045

The Cub Cadet LT1045 is a reliable and versatile lawn tractor designed to handle various terrain with ease. Its robust Kohler engine and 18-inch turning radius make it ideal for large lawns and uneven ground. The comprehensive manual provides clear instructions for safe operation‚ maintenance‚ and troubleshooting‚ ensuring users can address issues promptly. By following the guidelines‚ owners can maximize the tractor’s performance and extend its lifespan. Overall‚ the LT1045 is a durable and efficient choice for homeowners seeking a high-quality lawn tractor. Regular maintenance and adherence to safety protocols will ensure years of dependable service.

gmc sierra manual

The GMC Sierra manual is a comprehensive guide designed to help owners understand and maintain their vehicle effectively. It covers features, maintenance, and troubleshooting, ensuring optimal performance and safety. This essential resource is indispensable for both new and experienced drivers, providing detailed insights into the Sierra’s capabilities and proper care routines.

1.1 Overview of the GMC Sierra

The GMC Sierra is a full-size pickup truck renowned for its capability, versatility, and advanced features. Known for its rugged design and powerful performance, the Sierra offers a range of engine options, including V8 engines, and boasts impressive towing and payload capacities. Available in various trims like the Sierra Denali and AT4X, it caters to diverse needs, from luxury to off-road adventures. The Sierra features a spacious interior, cutting-edge technology, and innovative towing systems, making it a top choice for both work and recreation. Its durability and reliability have solidified its reputation as a trusted vehicle in its class;

1.2 Importance of the Owner’s Manual

The GMC Sierra owner’s manual is an essential resource for understanding and maintaining your vehicle. It provides detailed information about features, maintenance schedules, and safety guidelines to ensure optimal performance and longevity. The manual helps owners troubleshoot common issues, understand warning lights, and perform routine checks. It also outlines proper operating procedures to avoid hazards and reduce risks associated with vehicle misuse. By referencing the manual, drivers can maximize their Sierra’s capabilities, whether for daily driving or off-road adventures. It serves as a valuable guide for both new and experienced owners, ensuring they get the most out of their GMC Sierra.

1.3 Key Features of the GMC Sierra

The GMC Sierra is a full-size pickup truck known for its rugged design, powerful engine options, and advanced technology features. It offers a range of capabilities, including impressive towing and payload capacities, making it suitable for both work and recreational use. The Sierra features an intuitive infotainment system, driver-assistance technologies, and a comfortable, well-equipped cabin. Available in various trims like the Denali and AT4X, it caters to different driving preferences, from luxury to off-road adventures. With its versatility and robust performance, the GMC Sierra is a reliable choice for those seeking a durable and feature-packed vehicle.

History of the GMC Sierra

The GMC Sierra, introduced as a full-size pickup truck, has evolved significantly since its debut, offering enhanced capabilities and features with each generation. Its rich history reflects continuous innovation and adaptation to market demands, establishing it as a reliable and versatile vehicle.

2.1 Evolution of the GMC Sierra

The GMC Sierra has undergone significant transformations since its introduction, with each generation focusing on enhanced performance, technology, and design. Recent models, such as the 2023 Sierra, boast advanced features like improved engine options and refined interiors. The Sierra Denali, introduced in 2020, offers a luxurious take on the classic pickup truck. In 2022, GMC unveiled the AT4X trim, further expanding the Sierra’s off-road capabilities. The AT4X AEV Edition, launched in 2023, represents a collaboration with American Expedition Vehicles, emphasizing ruggedness and versatility. These updates reflect GMC’s commitment to innovation, ensuring the Sierra remains a top choice for both work and adventure.

The Sierra Denali, introduced in 2020, represents the pinnacle of luxury and performance within the GMC Sierra lineup. Designed with a taller stance and larger cabin, it offers a refined driving experience. The Denali features an all-new chassis, enhancing ride quality and handling. Its premium interior, equipped with advanced technology, caters to both comfort and connectivity. As a flagship model, the Sierra Denali combines robust capabilities with sophisticated styling, making it a top choice for those seeking a blend of power and elegance in a full-size pickup truck.

2.3 Major Updates Over the Years

Over the years, the GMC Sierra has undergone significant updates to enhance performance, technology, and design. The 2020 model introduced a new platform, offering a larger, more capable truck with improved towing and payload capacities. In 2022, GMC expanded the Sierra lineup with the AT4X trim, focusing on off-road prowess. The 2023 model saw the addition of the AT4X AEV Edition, collaboration with American Expedition Vehicles, further elevating its off-road capabilities. These updates reflect GMC’s commitment to innovation, ensuring the Sierra remains a leader in the pickup truck market with advanced features and robust performance.

GMC Sierra Model Years

The GMC Sierra is available in various model years, from 1993 to 2025. Each year brings unique features and updates, ensuring versatility, capability, and consistent quality.

3.1 2023 GMC Sierra

The 2023 GMC Sierra 1500 stands out as a full-size pickup truck with enhanced features like a rugged design, advanced infotainment, and improved off-road capabilities. It offers powerful engine options, including a V8, and a refined interior. The Sierra 1500 is known for its versatility, making it suitable for both work and leisure. Owners can access the manual online or download it for detailed information on maintenance, features, and troubleshooting. This model year also introduced the AT4X AEV Edition, focusing on off-road performance, further solidifying its reputation as a capable and feature-rich vehicle.

3.2 2022 GMC Sierra

The 2022 GMC Sierra 1500 is a robust pickup truck offering a range of engine options, including a powerful V8. It features various trims, such as the Denali for luxury and the AT4 for off-road enthusiasts. The Sierra 1500 is known for its versatility, catering to both work and leisure needs. Owners can access the manual online, which provides detailed information on maintenance, features, and troubleshooting. The 2022 model introduced new wheel designs and color options, enhancing its appeal. This model year continues to emphasize capability and advanced features, making it a reliable choice for drivers seeking a dependable pickup truck.

3.3 2021 GMC Sierra

The 2021 GMC Sierra 1500 is a formidable pickup truck known for its rugged design and versatile capabilities. It offers multiple engine options, including a powerful V8, and advanced technology features like an intuitive infotainment system. The Sierra 1500 is designed to handle both heavy-duty tasks and everyday driving with ease. Owners can access the manual online, which provides detailed instructions for maintenance, troubleshooting, and utilizing the truck’s features effectively. The 2021 model continues to build on GMC’s reputation for reliability and performance, making it a popular choice among pickup enthusiasts seeking a balance of power and comfort.

3.4 Older Models (2019 and Earlier)

For GMC Sierra models from 2019 and earlier, the owner’s manual remains a vital resource for understanding and maintaining the vehicle. These models, including the Sierra Limited, introduced updated features like a new chassis and improved ride handling. The manual for these years provides detailed information on engine specifications, maintenance schedules, and troubleshooting common issues. Although older models may lack some of the advanced technology found in newer trims, the manual still serves as a comprehensive guide for optimal performance and longevity. Owners can download PDF versions of these manuals online, ensuring continued access to essential information for proper vehicle care.

Technical Specifications

The GMC Sierra offers a range of engine options, including powerful V8 engines, paired with advanced transmissions and drivetrains. It boasts impressive towing and payload capacities, making it a reliable choice for heavy-duty tasks. The specifications vary by model year, ensuring versatility and capability for diverse needs.

4.1 Engine Options

The GMC Sierra features a variety of powerful engine options to suit different needs. The standard 2.7L Turbo I4 delivers efficient performance, while the 5.3L V8 and 6.2L V8 engines offer enhanced power for towing and hauling. Additionally, the Sierra is available with a 3.0L Duramax Turbo-Diesel I6, providing exceptional torque and fuel efficiency. These engine choices ensure that drivers can select the perfect combination of power and efficiency, whether for daily driving or heavy-duty tasks. Each engine is paired with advanced technology to optimize performance and reliability, making the Sierra a versatile and capable pickup truck.

4.2 Transmission and Drivetrain

The GMC Sierra offers a range of advanced transmissions and drivetrains to enhance performance and capability. The 2.7L Turbo I4 engine is paired with an 8-speed automatic transmission, while the 5.3L and 6.2L V8 engines feature a smooth 10-speed automatic. For maximum torque, the 3.0L Duramax Turbo-Diesel I6 is also matched with a 10-speed automatic. The Sierra comes with rear-wheel drive (RWD) as standard, but four-wheel drive (4WD) is available for improved traction. Additionally, features like a two-speed transfer case and an automatic locking rear differential further enhance off-road and towing capabilities, ensuring the Sierra adapts to various driving conditions with ease and precision.

4.3 Towing Capacity

The GMC Sierra boasts impressive towing capabilities, with a maximum capacity of up to 14,000 lbs for the 2023 Sierra 1500 when properly equipped. The 6.2L V8 engine delivers the highest towing capacity, while the 5.3L V8 and 3.0L Duramax Turbo-Diesel I6 also provide robust towing performance. The Sierra’s advanced trailering system includes features like Trailer Sway Control and Hitch Guidance, ensuring stability and confidence when towing heavy loads. Additionally, the ProGrade Trailering System offers up to 14 camera views, enhancing visibility and control during towing operations. This makes the Sierra a reliable choice for hauling trailers, boats, or other heavy equipment with ease and precision.

4.4 Payload Capacity

The GMC Sierra offers a robust payload capacity, enabling it to handle heavy loads with ease. The 2023 Sierra 1500 can carry up to 3,900 lbs, depending on the engine and configuration. The 6.2L V8 engine provides the highest payload capacity, while the 5.3L V8 and 3.0L Duramax Turbo-Diesel I6 also deliver impressive results. The Sierra’s durable design and advanced suspension system ensure stability and control when carrying heavy cargo. Features like the MultiPro Tailgate and available cargo bed accessories further enhance the truck’s practicality, making it a versatile and reliable choice for work or recreation. This capability ensures the Sierra meets the demands of both professionals and enthusiasts alike.

Advanced Features of the GMC Sierra

The GMC Sierra boasts cutting-edge technology and innovative features, including a premium infotainment system, advanced safety features, and driver-assistance technologies for enhanced comfort and security. These features ensure a seamless and protected driving experience, catering to both convenience and safety needs, while also offering impressive off-road capabilities for adventure enthusiasts; The Sierra’s modern design and sophisticated systems make it a top choice for drivers seeking a balance of power, luxury, and advanced functionality on and off the road.

5.1 Infotainment System

The GMC Sierra features an advanced infotainment system designed to enhance your driving experience. With a high-resolution touchscreen display, it offers seamless navigation, Bluetooth connectivity, and compatibility with both Apple CarPlay and Android Auto. The system also includes voice command functionality, allowing drivers to control music, maps, and phone calls hands-free. Additionally, the Sierra’s infotainment system supports Wi-Fi hotspots, keeping you connected on the go. The intuitive interface and customizable settings ensure easy access to all features, making it a central hub for entertainment, communication, and navigation. This advanced technology ensures a connected and enjoyable ride for both drivers and passengers. The system is regularly updated to provide the latest features and improvements.

5.2 Safety Features

The GMC Sierra is equipped with a range of advanced safety features designed to protect drivers and passengers. These include forward collision alerts, automatic emergency braking, and lane-keeping assist, which help prevent accidents by monitoring the road and adjusting vehicle behavior. The Sierra also features adaptive cruise control, enabling a safe distance from other vehicles on the highway. Additionally, the truck offers rear cross-traffic alerts and parking sensors, enhancing visibility and reducing risks during low-speed maneuvers; These technologies work together to create a safer driving environment, providing peace of mind for both city commutes and off-road adventures. The Sierra’s robust safety suite ensures a secure and confident ride.

5.3 Driver-Assistance Technologies

The GMC Sierra incorporates cutting-edge driver-assistance technologies to enhance driving convenience and safety. Adaptive cruise control allows for hands-free driving, adjusting speed to maintain a safe distance from other vehicles. Lane change alerts and blind-spot monitoring provide alerts when vehicles are in the driver’s blind zones, reducing collision risks. The Sierra also features a 360-degree camera system, offering a complete view of the surroundings, which is especially useful for parking and towing. These technologies, part of GMC’s ProGrade Trailering System, simplify towing by providing trailer profiles and diagnostic checks, ensuring a secure connection and stable towing experience. Together, these advancements make driving safer and more enjoyable.

5.4 Off-Road Capabilities

The GMC Sierra excels in off-road environments, offering robust features like four-wheel drive and high ground clearance for tackling rugged terrain. The AT4X trim, introduced in 2022, is designed for extreme off-roading, featuring a strengthened suspension and enhanced skid plates. The Sierra also includes advanced technologies such as Terrain Mode, which optimizes engine and transmission settings for off-road conditions, and Crawl Mode for low-speed maneuvers. With its durable construction and specialized off-road packages, the Sierra delivers exceptional performance on trails, making it a reliable choice for adventurous drivers seeking both power and versatility in challenging environments.

The AT4X Trim

The AT4X trim, introduced in 2022, enhances the GMC Sierra’s off-road capabilities with a strengthened suspension, advanced drivetrain, and exclusive design elements for rugged adventures.

The AT4X trim was introduced in 2022 as a high-performance off-road variant of the GMC Sierra. Designed for adventurous drivers, it combines rugged capability with premium features. The AT4X features a strengthened suspension system, enhanced drivetrain, and exclusive design elements. It also includes advanced technologies like a multi-selectable traction control system. This trim is part of GMC’s strategy to cater to enthusiasts seeking a balance between luxury and off-road prowess. The AT4X quickly gained popularity for its versatility and durability, making it a standout option in the Sierra lineup.

6.2 AT4X AEV Edition

The AT4X AEV Edition, introduced in 2023, is an optional upgrade to the AT4X trim, developed in collaboration with American Expedition Vehicles. This off-road-focused package enhances the Sierra’s rugged capabilities, featuring a unique front grille and 33-inch all-terrain tires. Designed for extreme off-road conditions, the AEV Edition includes upgraded suspension components and underbody skid plates for added protection. It builds on the AT4X’s foundation, offering unparalleled durability and performance in challenging terrains. This special edition is a testament to GMC’s commitment to meeting the demands of off-road enthusiasts, making it a sought-after choice for adventurous drivers.

6.3 Off-Road Performance Features

The GMC Sierra AT4X excels in off-road performance with advanced features like Multimatic DSSV dampers, offering precise suspension control. Terrain Mode optimizes power delivery for low-speed, high-torque situations, while 33-inch all-terrain tires provide exceptional grip. The electronic locking rear differential enhances traction on uneven surfaces. Protective underbody skid plates safeguard critical components during rugged adventures. Additionally, the Sierra’s Crawl Mode allows for precise vehicle control at low speeds, making it ideal for rock crawling. These features, combined with a robust 4WD system, elevate the Sierra’s off-road capabilities, ensuring confidence and reliability in the most challenging environments.

Obtaining the GMC Sierra Manual

The GMC Sierra manual can be easily downloaded from GMC’s official website in PDF format, free of charge, for various model years. Additionally, printed versions are available for purchase, ensuring access to essential information for vehicle maintenance and operation.

7.1 Downloading the Manual

Downloading the GMC Sierra manual is a straightforward process. Visit the official GMC website and navigate to the “Owners” section. Select your vehicle’s model year and series to access the downloadable PDF version. This digital format allows for easy reference and storage on your computer or mobile device. The manual covers essential information, including maintenance schedules, safety guidelines, and feature explanations. For users with specific needs, additional resources like quick start guides are also available. This convenient option ensures you always have the manual on hand for quick consultations.

7.2 Printed Manual Options

While digital versions are convenient, printed GMC Sierra manuals are available for those who prefer physical copies. These can be purchased through GMC’s official website or authorized dealerships. The printed manual provides a comprehensive guide, covering all aspects of vehicle ownership, from maintenance to advanced features. It is professionally bound and designed for durability, making it a valuable resource for long-term use. Prices typically range around $50, depending on the model year and trim level. Ensure to purchase from authorized sources to guarantee authenticity and relevance to your specific GMC Sierra model.

7.3 Online Resources

GMC offers extensive online resources for Sierra owners, including downloadable PDF manuals for model years 1993 to 2025. These manuals are accessible on GMC’s official website, allowing users to view, print, or save them conveniently. Additional online guides and support materials are available, providing detailed information on features, troubleshooting, and maintenance. GMC’s website also offers a directory organized by year, making it easy to find specific manuals. These resources ensure that owners have quick access to essential information, enhancing their ownership experience and enabling them to make informed decisions about their vehicle’s care and customization.

Maintenance and Service

Regular maintenance is crucial for the GMC Sierra’s longevity. The manual outlines scheduled services, DIY tips, and service intervals to ensure optimal performance and reliability over time.

8.1 Scheduled Maintenance

Scheduled maintenance is essential for ensuring the GMC Sierra operates efficiently and reliably. The manual provides detailed service intervals, recommending regular checks for engine oil, tires, and brakes. It also outlines the importance of timing belt replacements and fluid changes to prevent wear and tear. By following the recommended schedule, owners can maintain warranty compliance and avoid costly repairs. Additionally, the manual includes guidelines for inspecting belts, hoses, and battery health. Adhering to these routines ensures optimal performance, fuel efficiency, and longevity of the vehicle. Refer to the manual for specific intervals tailored to your Sierra’s model year and usage conditions.

8.2 DIY Maintenance Tips

The GMC Sierra manual offers practical DIY maintenance tips to help owners keep their vehicle in top condition. Regular oil changes, tire pressure checks, and air filter inspections are emphasized. Owners can learn to replace wiper blades, check brake pads, and inspect belts and hoses. The manual also provides guidance on battery maintenance and fluid level checks. These simple tasks can save money and ensure reliability. Always use genuine parts and follow safety guidelines. Consult the manual for step-by-step instructions tailored to your Sierra’s model year and specifications.

8.3 Service Intervals

The GMC Sierra manual outlines recommended service intervals to ensure optimal vehicle performance and longevity. Regular maintenance, such as oil changes every 5,000 to 7,500 miles, is crucial. Tire rotations should occur every 7,500 to 10,000 miles to maintain even tread wear. Brake inspections are advised every 12,000 to 15,000 miles, while spark plug replacements are typically needed around 100,000 miles. The manual also recommends checking belts and hoses at 50,000-mile intervals. Following these schedules helps prevent mechanical issues and ensures your Sierra runs efficiently. Always refer to your specific model year manual for precise recommendations tailored to your vehicle.

Troubleshooting Common Issues

The GMC Sierra manual provides detailed troubleshooting guides to address common issues. From warning light diagnostics to resolving mechanical problems, it offers step-by-step solutions to keep your vehicle running smoothly.

9.1 Using the Manual for Diagnostics

The GMC Sierra manual provides a detailed diagnostics section to help identify and address common issues. It includes explanations of warning lights, error codes, and step-by-step troubleshooting procedures. By referencing the manual, owners can quickly diagnose problems related to engine performance, electrical systems, or other components. The manual also outlines when professional assistance is required, ensuring safety and preventing further damage. This resource is essential for proactive maintenance and resolving issues efficiently, helping drivers keep their Sierra in optimal condition. Regular use of the diagnostic guide can enhance overall vehicle reliability and longevity.

9.2 Common Issues and Solutions

The GMC Sierra manual addresses common issues owners may encounter, such as dashboard warning lights, infotainment system glitches, and connectivity problems. It explains the causes, such as software updates or sensor malfunctions, and provides step-by-step solutions. For example, resetting the infotainment system or recalibrating sensors can often resolve issues. The manual also advises when professional assistance is necessary, ensuring safety and preventing further damage. Regularly reviewing the manual helps owners identify and address problems early, minimizing downtime and maintaining the Sierra’s performance and reliability.

9.3 Resetting Warning Lights

The GMC Sierra manual provides clear instructions for resetting warning lights on the dashboard. Common issues like “Check Engine” or traction control alerts can often be resolved by cycling the ignition or using a scan tool. The manual outlines step-by-step procedures to reset these indicators, ensuring proper system functionality. It also advises consulting a certified technician if the issue persists. Regularly resetting warning lights after addressing underlying problems helps maintain accurate system monitoring and prevents unnecessary alarms. Always refer to the manual for specific reset procedures to avoid clearing critical diagnostic data. This ensures driver safety and vehicle reliability.

The GMC Sierra manual is an essential resource, providing comprehensive guidance for owners to understand, maintain, and troubleshoot their vehicle effectively, ensuring optimal performance and safety.

10.1 Summary of Key Points

The GMC Sierra manual serves as a vital guide, offering detailed information on features, maintenance, and troubleshooting. It ensures owners can optimize their vehicle’s performance and safety. From engine specifications to advanced technologies, the manual covers essential aspects. Regular updates and model-specific details are provided, helping users stay informed. Whether for routine checks or addressing issues, the manual is a trusted companion. Its comprehensive approach makes it indispensable for both new and experienced drivers, ensuring the Sierra operates at its best.

10.2 Final Thoughts on the GMC Sierra Manual

The GMC Sierra manual is an essential resource for owners, providing clear guidance on vehicle operation, maintenance, and troubleshooting. Its comprehensive coverage ensures owners can maximize their truck’s potential while maintaining safety and performance. With detailed instructions and model-specific information, the manual caters to both new and experienced drivers. Whether accessed online or in print, it remains a reliable companion for Sierra owners, helping them navigate every aspect of ownership with confidence and ease.

aroeve mk01 manual

Product Overview

The AROEVE MK01 is a high-quality air purifier designed to effectively remove pollutants, allergens, and harmful particles from the air, improving indoor air quality․ Compact and stylish, it is ideal for small to medium-sized spaces, covering up to 215 square feet․ With its H13 HEPA filter, it efficiently captures smoke, pollen, dander, and other airborne contaminants, ensuring cleaner and healthier air for your home․

1․1 Key Features of the AROEVE MK01 Air Purifier

The AROEVE MK01 air purifier boasts several standout features, including a powerful H13 HEPA filter that captures 99․97% of particles as small as 0․3 microns, such as dust, pollen, and pet dander․ It offers three fan speed settings and a sleep mode for ultra-quiet operation, making it ideal for bedrooms․ The unit is compact, measuring 6․1D x 6․1W x 9․7H inches, and weighs just 3 pounds, allowing easy placement in small spaces․ It covers up to 215 square feet and operates at a low noise level of 22dB․ Additional features include an LED indicator for filter status and a user-friendly control panel with a reset button for convenient operation․

1․2 Design and Build Quality

The AROEVE MK01 air purifier features a sleek and compact design, making it a stylish addition to any room․ Its cylindrical shape with a white finish blends seamlessly with modern home decor․ Constructed from high-quality materials, the unit is durable and lightweight, weighing only 3 pounds, which allows for easy relocation․ The build quality ensures smooth operation, with a sturdy base that prevents wobbling․ The air purifier’s control panel is intuitive, with a simple interface that includes buttons for power, fan speed, and mode selection․ The overall design emphasizes functionality while maintaining an aesthetically pleasing appearance, ensuring it fits well in various settings, from bedrooms to living rooms․

1․3 Technical Specifications

The AROEVE MK01 air purifier is designed with advanced features to ensure optimal performance․ It covers an area of up to 215 square feet, making it suitable for small to medium-sized rooms․ The unit measures 6․1 inches in depth, 6․1 inches in width, and 9․7 inches in height, with a lightweight design of just 3 pounds for easy portability․ The air purifier operates at a low noise level of 22dB, ensuring quiet operation during sleep or work․ It features three fan speed settings, allowing users to adjust airflow according to their needs․ The H13 HEPA filter captures 99․97% of airborne particles as small as 0․3 microns, including dust, pollen, and pet dander, providing effective air purification․

Installation Guide

Unbox and remove all packaging materials․ Carefully take out the air purifier and ensure the filter is unpackaged․ Place the unit on a flat, stable surface away from walls for optimal airflow․ Plug in the power cord and press the power button to start the device․ Refer to the manual for detailed setup instructions․

2․1 Unboxing and Initial Setup

Start by carefully unboxing the AROEVE MK01 air purifier and removing all packaging materials․ Ensure the unit and accessories, such as the power cord, are intact; Locate the pre-installed filter and remove any plastic wrapping or protective packaging to ensure proper airflow․ Gently place the air purifier on a stable, flat surface, avoiding carpets or uneven ground․ Plug in the power cord and press the power button to initiate the device․ The LED indicator will light up, signaling the unit is ready for operation․ Refer to the manual for additional setup instructions to ensure optimal performance and safety․

2․2 Placing the Unit in the Optimal Location

For maximum efficiency, place the AROEVE MK01 in a central location within the room, ensuring at least 12 inches of clearance from walls and furniture․ This allows unobstructed airflow and even air circulation․ Avoid placing the unit in corners or near windows, as this can reduce its effectiveness․ It is also recommended to position the air purifier on a stable, elevated surface to enhance airflow and coverage․ Ensure the device is at least 3 feet away from any heating vents or radiators to prevent interference․ Proper placement ensures the MK01 can effectively purify the air in spaces up to 215 square feet․

2․3 Preparing the Filter for First Use

Before first use, ensure the filter is properly prepared․ Carefully remove the filter from its packaging and check for any plastic wrapping or protective covers․ Gently peel off any packaging materials from the filter surface to ensure it is fully exposed․ Do not wash or dampen the filter, as this may damage its efficiency․ Align the filter with the unit’s filter compartment, ensuring it fits securely․ Close the compartment tightly to maintain proper sealing․ Turn on the device to test airflow and ensure the filter is functioning correctly․ Proper preparation ensures optimal performance and longevity of the filter․

Operating Instructions

Press the ON/OFF button to start the device․ Adjust fan speed using the mode button․ Use sleep mode for quieter operation․ Check LED indicators for filter status․

3․1 Starting the Device

To start the AROEVE MK01 air purifier, ensure it is properly plugged into a power outlet․ Press the ON/OFF button located on the top control panel․ The device will begin operation in its default mode․ The LED indicator will illuminate, confirming the unit is active․ Before first use, make sure the filter is correctly installed and any packaging materials are removed․ If the red indicator light is on, check if the filter needs replacement or if there are any blockages․ Allow the device to run for a few minutes to begin purifying the air effectively․ For optimal performance, place the unit in an open area away from walls and obstructions․

3․2 Adjusting Fan Speed and Modes

To start the AROEVE MK01 air purifier, ensure it is properly plugged into a power outlet․ Press the ON/OFF button located on the top control panel․ The device will begin operation in its default mode․ The LED indicator will illuminate, confirming the unit is active․ Before first use, make sure the filter is correctly installed and any packaging materials are removed․ If the red indicator light is on, check if the filter needs replacement or if there are any blockages․ Allow the device to run for a few minutes to begin purifying the air effectively․ For optimal performance, place the unit in an open area away from walls and obstructions․

3․3 Using Sleep Mode

To activate Sleep Mode on the AROEVE MK01, press and hold the “ON/OFF & Modes” button until the device enters a quieter operation․ This mode reduces fan speed, minimizing noise levels to 22dB, ideal for uninterrupted sleep․ The LED indicator will dim, and the air purifier will automatically adjust to a lower setting․ Sleep Mode optimizes energy consumption and ensures continuous air purification without disturbances․ To exit Sleep Mode, press the button again to resume normal operation․ This feature is particularly useful for bedrooms, ensuring a peaceful environment while maintaining clean air quality throughout the night․

3․4 Understanding LED Indicators

The AROEVE MK01 features LED indicators that provide essential feedback about the device’s status․ The red indicator light signals when the filter needs replacement or if there’s a malfunction․ A steady blue light indicates normal operation, while a flashing blue light signals mode changes or adjustments․ The LED also dims in Sleep Mode to avoid disrupting your environment․ Understanding these indicators helps users maintain optimal performance and address issues promptly, ensuring efficient air purification and device longevity․

Maintenance and Cleaning

Regular maintenance ensures the AROEVE MK01 operates efficiently․ Clean the pre-filter monthly and replace filters as indicated by the red LED indicator for optimal performance․

4․1 Filter Replacement Guide

To ensure optimal performance, replace the filter in your AROEVE MK01 when the red indicator light turns on․ First, switch off and unplug the device․ Open the base cover by rotating it counterclockwise․ Carefully pull out the old filter and discard it․ Remove the packaging from the new filter and insert it, aligning it properly․ Close the base cover and plug in the device․ Press the reset button for 3-5 seconds to reset the filter light․ Clean or replace the pre-filter as needed for best results․ Regular filter replacement ensures effective air purification and prolongs the unit’s lifespan․

4․2 Cleaning the Pre-Filter

Cleaning the pre-filter regularly is essential for maintaining the AROEVE MK01’s efficiency․ Turn off and unplug the device before starting․ Open the base cover by rotating it counterclockwise to access the pre-filter․ Gently remove the pre-filter and vacuum it using a soft brush attachment to remove dust and debris․ For deeper cleaning, wash it with mild soap and lukewarm water, then allow it to air dry completely before reinstalling․ Avoid using harsh chemicals or abrasive materials, as they may damage the filter․ Cleaning the pre-filter every 1-2 months ensures optimal performance and prolongs the life of the main filter․

4․3 Regular Maintenance Tasks

Regular maintenance is crucial to ensure the AROEVE MK01 operates efficiently․ Check the filter every 1-3 months, depending on usage and air quality․ Replace the HEPA filter every 6-8 months or when the red indicator light turns on․ To replace, align the new filter’s tabs with the unit’s slots and twist counterclockwise․ Also, clean the exterior with a soft cloth to prevent dust buildup․ Avoid using harsh chemicals, as they may damage the surface․ Ensure proper air circulation by keeping the purifier at least 3 feet away from walls and furniture․ Regularly inspect and clean the pre-filter to maintain optimal performance․ Reset the filter indicator by pressing the reset button for 3 seconds after replacing the filter․

Safety Instructions

Always keep the AROEVE MK01 out of children’s reach and ensure it is placed on a stable, flat surface away from water to avoid electrical hazards․

5․1 General Safety Precautions

To ensure safe operation of the AROEVE MK01 air purifier, always follow these guidelines:
– Place the unit on a stable, flat surface away from water to prevent electrical hazards․
– Keep children away from the device to avoid accidental tampering․
– Do not insert fingers or objects into the air purifier’s vents or openings․
– Avoid exposure to extreme temperatures or humidity levels․
– Ensure the device is used only for its intended purpose and in accordance with the manual․
– Never operate the air purifier near open flames or sparks․
– Maintain proper ventilation in the room while the device is in use․
– Follow all electrical safety guidelines to prevent shocks or malfunctions․
By adhering to these precautions, you can ensure safe and effective performance of the AROEVE MK01 air purifier․

5․2 Electrical Safety Guidelines

For safe operation of the AROEVE MK01 air purifier, follow these electrical safety guidelines:
– Use the device only with the provided power cord and adapter to avoid electrical hazards․
– Plug the air purifier into a grounded electrical outlet to prevent shocks․
– Never overload the outlet with multiple high-power devices․

– Avoid using damaged cords or plugs, as this can lead to electrical fires or shocks․
– Keep the power cord away from water and heat sources to prevent damage․
– Unplug the device when cleaning, maintaining, or replacing filters to ensure safety․
– Do not modify the electrical components, as this voids the warranty and poses risks․
By adhering to these guidelines, you can ensure safe and reliable operation of the AROEVE MK01 air purifier․

5․3 Operating Environment Recommendations

To ensure optimal performance of the AROEVE MK01 air purifier, place it in an environment with a temperature range of 14°F to 104°F (-10°C to 40°C) and humidity below 80%․ Avoid direct sunlight or extreme heat sources, as this may damage the device․ Keep the unit at least 3 feet away from walls or obstacles to allow proper air circulation; Clean the pre-filter every 1-3 months, depending on usage, to maintain efficiency․ For best results, use the air purifier in rooms up to 215 square feet, such as bedrooms, living rooms, or offices․ Avoid placing it near strong chemicals or odors, as this may affect filter performance and air quality․

Troubleshooting Common Issues

Common issues include the red indicator light staying on, device not turning on, or unusual noises․ Check power supply, filters, and ensure proper unit placement for resolution․

6․1 Red Indicator Light

The red indicator light on the AROEVE MK01 signals that the filter needs replacement or cleaning․ To resolve this, check and replace the HEPA or pre-filter as needed; Ensure all filters are properly installed and clean․ If the issue persists, refer to the user manual for additional troubleshooting steps․ Proper maintenance ensures optimal performance and air quality․ Always follow the manufacturer’s guidelines for filter replacement and cleaning to keep your air purifier functioning effectively․ Regular checks can prevent operational issues and maintain clean air circulation in your home environment․ This simple step helps extend the life of your device․

6․2 Device Not Turning On

If the AROEVE MK01 does not turn on, first ensure it is properly plugged into a working electrical outlet․ Check the power cord for any visible damage or kinks․ Verify that the outlet is functioning by testing it with another device․ If the issue persists, inspect the power button for any obstructions or malfunctions․ Additionally, ensure that no safety features or child locks are activated․ If all else fails, consult the user manual or contact customer support for further assistance․ Addressing this issue promptly ensures uninterrupted operation and continued air purification․ Regular checks can help maintain the device’s functionality and extend its lifespan․ Always refer to the manual for troubleshooting guidance․

6․3 Unusual Noises

If the AROEVE MK01 emits unusual noises, it may indicate an issue with the fan or internal components․ First, ensure the pre-filter and HEPA filter are clean and properly installed, as dust buildup can cause vibrations․ Check for any loose or misaligned parts inside the unit․ If the noise persists, it could be due to a faulty motor or fan blade․ In such cases, turn off the device and unplug it for safety․ Contact customer support for professional assistance or replacement․ Regular maintenance, such as cleaning the pre-filter and replacing the HEPA filter, can help prevent such issues․ Always refer to the user manual for troubleshooting guidance before attempting any repairs․

Warranty and Customer Support

The AROEVE MK01 comes with a comprehensive warranty covering manufacturing defects․ For inquiries or issues, contact customer support at support@aroeve․com․ The warranty details are outlined in the PDF manual․

7․1 Warranty Coverage Details

The AROEVE MK01 air purifier is backed by a comprehensive warranty that covers manufacturing defects and ensures customer satisfaction․ The warranty period typically lasts for a specified duration, during which any defective parts or malfunctioning units can be repaired or replaced free of charge․ For detailed terms and conditions, including the warranty’s start date, coverage scope, and exclusions, refer to the official PDF manual․ Additionally, the warranty may vary depending on the region and purchase location, so it’s essential to review the documentation provided with your purchase or contact customer support for clarification․

7․2 Contacting Customer Service

For any inquiries or support regarding the AROEVE MK01 air purifier, customers can contact the dedicated customer service team․ The official PDF manual provides detailed contact information, ensuring easy access to assistance; You can reach customer service via email at support@aroeve․com for troubleshooting, warranty-related questions, or general product inquiries․ The team is committed to providing prompt and helpful support to ensure a satisfactory user experience․

User Manual and Resources

The AROEVE MK01 user manual is available for download as a PDF from the official website or authorized retailers․ It provides comprehensive guidance on installation, operation, and maintenance, ensuring optimal performance․ Additionally, online support and FAQs are accessible to address common questions and troubleshooting․

8․1 Downloading the PDF Manual

To download the AROEVE MK01 PDF manual, visit the official AROEVE website or authorized retailers․ Navigate to the “Support” or “Resources” section, where you’ll find a direct link to the manual․ The PDF is free to download and provides detailed instructions for installation, operation, and maintenance․ It also includes troubleshooting tips and technical specifications․ Ensure you download the correct manual for the MK01 model to access accurate information․ If you encounter issues, contact customer support at support@aroeve․com for assistance․ The manual is essential for optimizing your air purifier’s performance and addressing any operational concerns effectively․

8․2 Online Support and FAQs

AROEVE provides comprehensive online support and FAQs to address common questions and concerns about the MK01 air purifier․ Visit their official website or refer to the PDF manual for detailed FAQs covering installation, operation, and troubleshooting․ The support section includes guides for resolving issues like the red indicator light, device malfunctions, and noise problems․ Additionally, customer service can be reached at support@aroeve․com for personalized assistance․ The FAQs are designed to help users optimize their air purifier’s performance and resolve issues quickly, ensuring a seamless experience with the AROEVE MK01․

User Reviews and Ratings

Users praise the AROEVE MK01 for its effectiveness, quiet operation, and value․ Common critiques include the red indicator light staying on․ Overall, satisfaction is high․

9․1 Overall Satisfaction

Users of the AROEVE MK01 air purifier have expressed high overall satisfaction with its performance․ Many have praised its effectiveness in improving indoor air quality, noting a significant reduction in allergens and odors․ The compact design and quiet operation are frequently highlighted as positive features, making it ideal for bedrooms and small spaces․ Customers also appreciate the intuitive controls and the sleep mode, which enhances usability․ While some users mentioned minor concerns, such as the red indicator light staying on, the majority agree that the MK01 provides excellent value for its price․ Overall, it is well-regarded for its reliability and efficiency in maintaining clean air․

9․2 Common Praise and Criticisms

The AROEVE MK01 has received widespread praise for its effectiveness in reducing airborne pollutants and allergens, with many users noting a noticeable improvement in air quality․ Its compact design and quiet operation, particularly in sleep mode, are frequently commended․ The ease of use and affordable price point are also highlighted as major positives․ Customers appreciate the intuitive controls and the ability to cover small to medium-sized spaces efficiently․

Some users have criticized the red indicator light for being too bright and persistent, which can be distracting in dark rooms․ Others mention that the filter replacement frequency can be a minor inconvenience․ Despite these, the overall consensus remains positive, with the MK01 being a reliable choice for everyday use․

club car ds service manual pdf

The Club Car DS Service Manual is a comprehensive guide for maintaining‚ troubleshooting‚ and repairing Club Car DS models. Available as a PDF‚ it covers various model years‚ ensuring users have detailed instructions for optimal performance and compliance with safety standards.

1.1 Overview of the Club Car DS Service Manual

The Club Car DS Service Manual is a detailed resource designed to assist users in maintaining‚ troubleshooting‚ and repairing Club Car DS golf carts. Covering both gasoline and electric models‚ the manual provides comprehensive guidance for various model years‚ including 2004‚ 2009-2012‚ and 2014 versions. It includes sections on routine maintenance‚ battery care‚ inspections‚ and step-by-step repair procedures. The manual also offers diagnostic techniques and tools‚ ensuring users can identify and resolve common issues effectively. Available as a downloadable PDF‚ it serves as an essential reference for owners‚ technicians‚ and enthusiasts‚ promoting safe and efficient servicing of Club Car DS vehicles.

1.2 Importance of the Service Manual

The Club Car DS Service Manual is crucial for ensuring the longevity and optimal performance of Club Car vehicles. It provides essential information for maintaining safety‚ preventing damage‚ and conducting proper repairs. By following the manual‚ users can avoid costly mistakes and ensure compliance with manufacturer standards. The guide is invaluable for both novice owners and experienced technicians‚ offering clear instructions and specifications. Regular use of the manual helps maintain vehicle reliability‚ reduces downtime‚ and ensures safe operation. It is a must-have resource for anyone servicing or owning a Club Car DS model‚ covering critical aspects of maintenance and repair effectively.

1.3 Key Features of the Manual

The Club Car DS Service Manual is a comprehensive resource packed with detailed maintenance procedures‚ troubleshooting guides‚ and repair instructions. It includes model-specific information for various years‚ such as 2004‚ 2009-2012‚ and 2014 models‚ ensuring clarity and relevance. The manual features step-by-step repair procedures‚ parts identification‚ and safety guidelines to ensure proper servicing. Additionally‚ it provides inspection checklists‚ battery care tips‚ and diagnostic techniques‚ making it a versatile tool for both professionals and DIY enthusiasts. The manual also offers download links for easy access and contact information for Club Car technical support‚ further enhancing its utility. These features make it an indispensable guide for maintaining and repairing Club Car DS vehicles efficiently and safely.

Safety Guidelines and Precautions

The manual emphasizes strict adherence to safety guidelines to prevent vehicle damage and ensure user safety. Always wear protective equipment and handle chemicals with care.

2.1 General Safety Practices

The Club Car DS Service Manual outlines essential safety practices to ensure safe servicing and maintenance. Always follow proper procedures to prevent injuries and vehicle damage. Before starting any maintenance‚ disconnect the battery to avoid accidental start-ups. Use jack stands to secure the vehicle and ensure it is on level ground. Avoid wearing loose clothing or jewelry that could get caught in moving parts. Keep tools and work areas organized to prevent accidents. Never attempt repairs without proper knowledge or tools. Always refer to the manual for specific instructions and guidelines. Safety practices are critical to protecting both the technician and the vehicle from potential harm.

2.2 Protective Equipment Requirements

Wearing proper protective equipment is crucial when servicing Club Car DS vehicles to prevent injuries. Safety glasses or goggles should always be worn to protect eyes from debris or chemicals. Gloves are essential to prevent cuts‚ abrasions‚ and electrical shocks. Steel-toe shoes or work boots are recommended to protect feet from heavy tools or falling parts. A face shield is necessary during welding or grinding tasks. Ensure all personal protective equipment (PPE) meets safety standards and is in good condition. Never use substandard or damaged gear. Additional protection‚ such as non-slip gloves or chemical-resistant eyewear‚ may be required for specific tasks. Always prioritize safety by using appropriate PPE as outlined in the manual.

2.3 Handling Chemicals and Materials Safely

Proper handling of chemicals and materials is essential to ensure safety and prevent potential hazards. Always wear protective gloves and eyewear when working with chemicals or batteries. Use jack stands and supports to stabilize the vehicle during repairs to avoid accidental damage. Store chemicals in well-ventilated areas‚ away from open flames or sparks‚ and follow the manufacturer’s instructions for use and disposal. Never mix incompatible substances‚ as this can lead to dangerous reactions. Keep a fire extinguisher nearby and ensure good ventilation to prevent inhalation of fumes. Dispose of hazardous materials according to local regulations and environmental guidelines. Always refer to the manual for specific safety precautions.

Maintenance Procedures

Regular maintenance is crucial for ensuring the longevity and performance of your Club Car DS. Follow the manual’s guidelines for routine checks‚ inspections‚ and care to maintain reliability and safety. Use approved tools and materials‚ and adhere to scheduled service intervals to prevent wear and tear. Proper upkeep of batteries‚ brakes‚ and electrical systems is essential for optimal functionality. Keep detailed records of all maintenance activities to track the vehicle’s condition and plan future services effectively. Always refer to the manual for specific procedures and recommendations tailored to your Club Car DS model.

3.1 Routine Maintenance Schedule

A well-structured routine maintenance schedule is essential for ensuring the optimal performance and longevity of your Club Car DS. The manual outlines specific intervals for inspections‚ lubrication‚ and part replacements. Regular checks include tire pressure‚ brake systems‚ and battery health. For gasoline models‚ oil changes and filter replacements are required every 50 hours‚ while electric models need battery water levels checked monthly. Annual inspections cover the steering‚ suspension‚ and electrical connections. Adhering to this schedule prevents premature wear and ensures safety. Always refer to the manual for model-specific recommendations‚ as procedures may vary slightly between years and configurations. Proper record-keeping of maintenance activities is also advised for tracking purposes.

3.2 Battery Maintenance and Care

Proper battery maintenance is crucial for extending the life of your Club Car DS. For electric models‚ regular inspections of the battery terminals and cables are essential to ensure clean‚ tight connections. Water levels in flooded batteries should be checked monthly and filled as needed‚ while sealed batteries require no maintenance. Avoiding deep discharges and keeping the batteries charged between 50-80% when not in use can prevent damage. Cleaning terminals with a wire brush and baking soda solution helps maintain conductivity. Always follow the manual’s guidelines for charging cycles and avoid extreme temperatures. Proper care ensures reliable performance and prolongs battery life. Regular maintenance is key to optimal functionality.

3.3 Regular Inspections Checklist

A regular inspections checklist is vital for ensuring the Club Car DS operates safely and efficiently. Begin with checking the brakes for proper function and wear. Inspect the tire pressure and tread depth‚ adjusting as needed. Examine the battery connections for cleanliness and tightness‚ and verify the electrolyte levels in flooded batteries. Check the electrical system‚ including lights‚ horns‚ and chargers‚ for faults. Lubricate moving parts like suspension components and steering links. Inspect the seat belts‚ pedals‚ and accelerator for wear or damage. Ensure all fluid levels‚ such as oil and coolant‚ are within recommended ranges. Finally‚ review the inspection schedule in the manual to stay on track. Regular checks prevent breakdowns and ensure reliability.

Troubleshooting Common Issues

The manual provides detailed troubleshooting guides for common issues like electrical system faults‚ battery problems‚ and mechanical failures. Use diagnostic tools and charts to identify root causes and resolve issues efficiently.

4.1 Identifying Common Problems

The Club Car DS Service Manual outlines common issues users may encounter‚ such as electrical system faults‚ battery drainage‚ and mechanical failures. It provides detailed symptom-based troubleshooting charts to help diagnose problems accurately. For example‚ if the vehicle experiences slow acceleration or intermittent power loss‚ the manual guides users to check the battery connections‚ motor brushes‚ or controller settings. Additionally‚ it covers issues specific to both gas and electric models‚ ensuring comprehensive coverage for all Club Car DS variants. By following the manual’s diagnostic procedures‚ users can identify root causes efficiently and address them before they escalate‚ minimizing downtime and ensuring optimal performance.

4.2 Diagnostic Techniques and Tools

The Club Car DS Service Manual provides detailed diagnostic techniques and tools to identify and resolve issues efficiently. It recommends using multimeters for electrical system checks‚ such as testing battery voltage and circuit continuity. Additionally‚ the manual suggests employing diagnostic software for advanced troubleshooting‚ particularly for models with electronic control systems. Essential tools include wrenches‚ screwdrivers‚ and torque wrenches for mechanical repairs. The manual also emphasizes the importance of following a step-by-step approach to isolate faults‚ ensuring accurate diagnoses. By utilizing these tools and techniques‚ users can efficiently pinpoint problems‚ whether they are electrical‚ mechanical‚ or related to the powertrain. Proper diagnostics ensure timely and effective repairs‚ maintaining vehicle performance and reliability.

Repair and Replacement Procedures

The manual provides detailed step-by-step repair procedures‚ including part identification‚ tool requirements‚ and replacement guidelines. It ensures safe and effective servicing‚ adhering to manufacturer specifications for optimal performance.

5.1 Identifying and Procuring Parts

Identifying the correct parts for your Club Car DS is crucial for proper maintenance and repairs. The service manual provides detailed part numbers‚ descriptions‚ and diagrams to help you locate the right components. Use the manual’s parts listing section to cross-reference items by model year and type (gasoline or electric). When procuring parts‚ ensure they are genuine Club Car components or approved equivalents to maintain vehicle performance and safety. You can purchase parts directly from authorized Club Car dealers or trusted suppliers. Always verify the part numbers and compatibility before ordering to avoid delays or incorrect installations. This ensures your Club Car DS operates efficiently and reliably. Proper procurement is essential for maintaining warranty validity and overall vehicle integrity.

5.2 Special Tools and Equipment Needed

The Club Car DS service manual outlines specific tools and equipment required for various repair and maintenance tasks. Essential tools include a torque wrench‚ multimeter‚ and hydraulic pressure tester for accurate diagnostics and adjustments. Specialized tools like the Club Car-approved battery tester and wiring diagram reader are also recommended. For tasks involving the powertrain or suspension‚ heavy-duty jack stands and axle support tools are necessary. Always use genuine Club Car tools or equivalents to ensure compatibility and safety. The manual provides a detailed list of required tools for each procedure‚ helping you prepare beforehand. Proper equipment ensures precise repairs‚ preventing further damage and maintaining your Club Car DS’s performance and reliability over time.

5.3 Step-by-Step Repair Procedures

The Club Car DS service manual provides detailed‚ step-by-step repair procedures for various components‚ ensuring clarity and precision. From replacing brakes to overhauling engines‚ each process is broken down into manageable tasks. Instructions include disassembly‚ inspection‚ and reassembly steps‚ with references to torque specifications and alignment requirements. Troubleshooting guides help identify root causes of issues‚ while diagrams and illustrations aid in understanding complex operations. The manual emphasizes safety protocols‚ such as disconnecting batteries before starting work. By following these procedures‚ users can restore their Club Car DS to optimal condition. Supplementary information‚ like parts lists and diagnostic tips‚ further enhances the repair experience‚ making it accessible for both novices and experienced technicians. Regular updates ensure the manual remains relevant for all model years.

Model-Specific Information

The manual provides detailed specifications and maintenance schedules for Club Car DS models across various years‚ including 2004‚ 2009-2012‚ and 2014‚ covering both gas and electric versions.

6.1 2004 Club Car DS Models

The 2004 Club Car DS models are covered extensively in the service manual‚ providing essential maintenance and repair guidelines. This includes detailed instructions for both gasoline and electric versions‚ ensuring optimal performance. The manual emphasizes safety protocols and outlines step-by-step procedures for routine checks and complex repairs. Specific to the 2004 models‚ it addresses components like the 4-cycle engine‚ electrical systems‚ and braking mechanisms; Users can also find parts lists and troubleshooting sections tailored to these models‚ making it an invaluable resource for owners and technicians. The information ensures compliance with manufacturer standards‚ ensuring longevity and reliability of the vehicle.

6.2 2009-2012 Club Car DS Models

The service manual for 2009-2012 Club Car DS models provides detailed guidance for maintenance‚ troubleshooting‚ and repairs. It covers both gasoline and electric versions‚ focusing on key systems like the PowerDrive Plus electric system and gas engine performance. The manual includes procedures for battery maintenance‚ motor inspections‚ and electrical diagnostics. Specific to these years‚ it addresses updates in the IQ System and V-Glide 36-volt technology. Users can find parts lists‚ repair steps‚ and safety precautions tailored to these models. Available as a PDF‚ this resource ensures owners and technicians can keep their vehicles running smoothly and efficiently‚ adhering to Club Car’s standards for reliability and safety.

6.3 2014 Club Car DS Models

The 2014 Club Car DS service manual details maintenance and repair procedures for both gas and electric models; It emphasizes updates in the PowerDrive Plus system and IQ technology. The manual includes detailed diagnostic steps for the 48-volt electric motor and fuel-injected gas engines. Users will find specifications for battery care‚ motor inspections‚ and electrical system troubleshooting. The guide also covers new features introduced in 2014‚ such as improved braking systems and suspension enhancements. Available as a PDF‚ this manual ensures owners and technicians can perform efficient and accurate servicing‚ maintaining the vehicle’s performance and longevity according to Club Car’s high standards.

Additional Resources and Support

Download the Club Car DS service manual PDF from authorized sources. Contact Club Car technical support at (706) 863-3000 for assistance. Access parts manuals and troubleshooting guides online.

7.1 Download Links for the Manual

Download the Club Car DS service manual PDF directly from the official Club Car website or authorized dealers. Visit Club Car’s official site and navigate to the support section. For specific models‚ such as the 2004 or 2014 DS‚ use the model year filter. Third-party sites like ManualsLib or Scribd also host downloadable versions. Ensure the manual is compatible with your vehicle’s model year and type (gasoline or electric). Always verify the source for authenticity and safety. Contact Club Car technical support if you need assistance finding the correct manual for your DS model.

7.2 Contacting Club Car Technical Support

For assistance with the Club Car DS service manual or any technical inquiries‚ contact Club Car’s Technical Support team. Reach them by phone at (706) 863-3000 or via mail at Club Car‚ Inc.‚ P.O. Box 204658‚ Augusta‚ GA 30917-4658. Visit their official website for additional support resources‚ including troubleshooting guides and service manual downloads. Ensure to have your vehicle’s model and serial number ready for efficient support. Their team is available to address questions not covered in the manual‚ providing expert guidance for maintenance and repairs.

us army survival field manual

The US Army Survival Field Manual (FM 21-76) is a comprehensive guide designed to equip individuals with essential survival skills in diverse environments․ Based on the keyword SURVIVAL, it emphasizes a systematic approach to staying alive, covering topics like shelter, water, fire, and food procurement․ This manual is invaluable for military personnel, outdoor enthusiasts, and anyone facing survival challenges, offering practical techniques and mindset strategies to overcome adversity․

The Psychology of Survival

The psychology of survival focuses on developing a resilient mindset, managing fear, and maintaining the will to survive․ It emphasizes mental toughness, emotional stability, and a positive attitude to overcome adversity effectively․

2․1․ The Survival Mindset

The survival mindset is a mental framework that enables individuals to stay focused and determined in life-threatening situations․ It begins with understanding the keyword SURVIVAL, which stands for Size Up (assess the situation), Unity (stay with your group), Adapt (be flexible), Initiate (take action), Act (do something), and Live (survive)․ This mindset emphasizes mental resilience, positivity, and the ability to overcome fear and panic․ By adopting a proactive attitude, individuals can make rational decisions, conserve energy, and stay motivated to survive․ A strong survival mindset is crucial for navigating extreme conditions and emerging victorious against adversity․

2․2․ Managing Fear and Stress

Managing fear and stress is critical to maintaining a clear mind and effective decision-making in survival situations․ Fear and stress can impair judgment, leading to poor choices that reduce chances of survival․ The key is to acknowledge these emotions without allowing them to overwhelm․ Techniques such as deep breathing, mental exercises, and focusing on immediate tasks can help calm the mind․ A positive attitude and confidence in one’s abilities are essential for overcoming panic․ The survival mindset, as outlined in the manual, emphasizes staying proactive and avoiding negative thoughts․ By controlling fear and stress, individuals can conserve energy, think clearly, and execute survival strategies effectively․ This mental discipline is as vital as any physical skill in ensuring survival․

Survival in Different Environments

The US Army Survival Manual provides detailed strategies for surviving in diverse environments, including arctic, desert, jungle, and temperate regions․ Each environment requires unique techniques for finding water, food, and shelter, as well as adapting to extreme conditions․ Understanding local ecosystems and leveraging available resources is crucial for staying alive․ The manual emphasizes the importance of knowledge, skills, and preparation to overcome environmental challenges effectively․ By mastering these principles, individuals can enhance their chances of survival in any setting․

3․1․ Arctic Survival

Surviving in the Arctic requires mastering techniques to withstand extreme cold and snow․ The US Army Survival Manual emphasizes building shelters like snow trenches or igloos to protect from wind and frostbite․ Conserving energy is critical, as overexertion can lead to hypothermia․ Staying dry is essential; moisture accelerates heat loss․ Finding water involves melting snow without wasting fuel, using techniques like solar melting or building a fire pit․ Signaling for rescue is vital, using bright colors, smoke, or reflective surfaces․ The manual also covers navigating by stars or landmarks and avoiding avalanches․ Understanding animal tracks can help locate food sources․ Psychological resilience is key; maintaining a positive mindset and rationing tasks prevents exhaustion․ The manual provides detailed steps to stay alive in one of Earth’s harshest environments, ensuring survival until rescue or self-recovery․

3․2․ Desert Survival

Desert survival requires managing extreme heat, limited water, and vast, barren landscapes․ The US Army Survival Manual highlights the importance of water conservation, as dehydration is a major threat․ Techniques include rationing water, avoiding daytime travel, and using cactus water as a last resort․ Shelter is critical to protect from sun exposure; options include digging a desert pit shelter or creating a lean-to with available materials․ Navigation can be challenging, but using the sun, stars, and landmarks helps maintain direction․ Signaling for rescue is essential, using methods like creating large smoke signals or reflecting sunlight with shiny objects․ The manual also covers finding food, such as insects or small animals, and staying mentally resilient to cope with isolation․ Proper clothing and movement techniques, like traveling at night, are emphasized to minimize heat exhaustion․ These strategies ensure survival in one of the most unforgiving environments on Earth․

3․3․ Jungle Survival

Jungle survival involves navigating dense vegetation, extreme humidity, and abundant wildlife․ The US Army Survival Manual emphasizes the importance of staying calm and using available resources․ Finding or creating a water source is crucial, as dehydration can occur quickly; methods include purifying stream water or collecting rainwater․ Shelter options range from debris huts to elevated platforms to avoid insects and animals․ Navigating through thick foliage requires using a compass and natural landmarks․ Wildlife, such as snakes and spiders, pose threats, so awareness and protective measures are vital․ Signaling for rescue, like creating smoke or using reflective surfaces, is essential․ The manual also advises on finding food, such as fruits, nuts, and small animals, while avoiding poisonous plants․ Mental resilience and resourcefulness are key to surviving in this demanding environment․

3․4․ Temperate Forests

Temperate forests present unique survival challenges, with moderate climates and dense vegetation․ The US Army Survival Manual advises staying calm and using natural resources effectively․ Water sources include streams, rivers, and rainwater collection․ Shelter options range from lean-tos to debris huts, blending seamlessly with the surroundings․ Firecraft is essential for warmth and cooking, using materials like dry wood and tinder․ Food procurement involves foraging for edible plants, hunting small animals, and using traps․ Navigating requires using landmarks, the sun, and stars․ Avoiding hazards like insects and inclement weather is crucial․ Signaling techniques, such as creating smoke or using reflective objects, are vital for rescue․ The manual emphasizes mental resilience and resourcefulness to thrive in these environments, ensuring survival until rescue or escape․

3․5․ Savannah and Grasslands

The US Army Survival Manual highlights the unique challenges of surviving in savannahs and grasslands, characterized by open spaces, limited vegetation, and variable climates․ Water procurement often involves locating shallow wells or collecting dew, while shelter options include natural formations like rock overhangs or dugouts․ Firecraft is crucial, using readily available materials like grass and dry wood․ Food procurement focuses on edible plants, insects, and small game, with techniques like traps and spears․ Navigation relies on celestial navigation and landmark tracking․ Signaling techniques include creating large smoke signals or reflective surfaces․ Mental adaptability and resourcefulness are key to overcoming the harsh conditions of these environments, ensuring survival until rescue or self-extraction․

Shelter Construction Techniques

Shelter is crucial for protection from extreme weather․
Techniques include using natural materials like branches, leaves, and snow․
Adapt methods to environment, ensuring durability and camouflage;

4․1․ Debris Huts

A debris hut is a simple yet effective shelter made from natural materials like branches, leaves, and grasses․ It blends seamlessly into the environment, providing excellent camouflage․ Start by creating a ridgepole between two sturdy trees or poles․ Place smaller sticks and branches on either side, forming a sloped roof․ Cover the structure with layers of leaves, grasses, or pine needles to insulate and waterproof it․ This shelter is ideal for tropical or temperate climates, offering protection from rain and wind․ Ensure the roof is sloped to allow water runoff and add bedding inside for comfort․ With proper construction, a debris hut can be durable and last several weeks, making it a reliable choice for long-term survival situations․

4․2․ Lean-Tos

A lean-to is a simple, field-expedient shelter that provides excellent protection from wind and rain․ It is constructed by placing a long ridgepole between two trees and covering it with smaller branches and foliage․ The roof is sloped to allow water runoff, and the open side faces away from the wind․ Lean-tos are ideal for environments with abundant trees and materials․ They can be reinforced with a fire reflector to maximize heat retention․ To build one, gather sturdy branches for the frame and cover them with leaves, grasses, or pine needles․ This shelter is lightweight, easy to assemble, and blends well with the surroundings․ It is particularly useful in forested areas where natural resources are readily available․ A well-constructed lean-to can provide reliable shelter in survival situations, keeping you dry and protected from harsh weather conditions․

4․3․ Snow Shelters

Snow shelters are essential for survival in arctic and snowy environments, providing protection from extreme cold, wind, and snow․ The most common types include the tree-pit shelter and the quinzhee hut․ To build a tree-pit shelter, find a snow-covered evergreen tree with branches that form a natural roof․ Clear the snow from the center, creating a pit, and line it with evergreen branches for insulation․ For a quinzhee hut, pile snow into a large mound, allowing it to set before hollowing out the center․ Both structures require careful construction to ensure stability and insulation; Proper ventilation is crucial to prevent carbon dioxide buildup․ Snow shelters are effective for retaining body heat and shielding from harsh winter conditions, making them a vital skill for survival in cold climates․ They are relatively easy to construct with basic tools and can be reinforced with additional snow or branches for added strength․

Water Procurement

Water procurement is critical for survival, involving locating natural sources like streams or ponds and ensuring safety through purification methods to prevent waterborne illnesses, essential for hydration and sustenance․

5․1․ Finding Water Sources

Locating water sources is a critical survival skill, as water is essential for hydration and sustenance․ The US Army Survival Field Manual provides detailed methods for identifying potential water sources in various environments․ These include streams, rivers, ponds, springs, and wetlands․ In arid regions, such as deserts, water may be scarce, but techniques like collecting dew or rainwater can be effective․ The manual also emphasizes the importance of recognizing natural signs of water, such as vegetation clusters, animal tracks, or bird activity․ Additionally, it covers methods like creating solar stills to extract water from mud or plants․ Knowing how to identify and access water sources significantly increases chances of survival in any environment, making this section a cornerstone of the manual’s practical guidance․

5․2․ Purification Methods

Water purification is a vital step in ensuring safe hydration, as untreated water can contain harmful pathogens, chemicals, or contaminants․ The US Army Survival Field Manual outlines several effective purification methods to make water safe for consumption․ Boiling water is the most reliable method, requiring just 10 minutes at a rolling boil to kill bacteria, viruses, and parasites․ For situations where boiling is impractical, the manual suggests using sand and charcoal filters to remove impurities․ Solar disinfection (SODIS) is another option, where water is exposed to sunlight in a clear container for at least six hours․ Chemical disinfection using chlorine or iodine tablets or tincture is also recommended, with specific guidelines for dosage․ These methods ensure access to safe drinking water, even in challenging environments, making water purification a critical survival skill․

Firecraft Techniques

Firecraft is a critical survival skill emphasized in the US Army Survival Field Manual, as fire provides warmth, light, a way to cook food, and a means of signaling for help․ The manual details how to construct various types of fires, including the teepee, log cabin, and lean-to structures, each suited for different environments and purposes․ It also covers the importance of selecting the right materials, such as tinder, kindling, and larger logs, to ensure a sustainable fire․ Additionally, the manual provides techniques for building fires in challenging conditions, such as wet or snowy environments․ Proper fire safety is stressed, including the use of fireboards to protect the ground and the necessity of completely extinguishing fires before leaving them unattended․ These techniques are essential for conserving energy, boosting morale, and improving overall survival chances in the wild․

Food Procurement

The US Army Survival Field Manual provides detailed methods for obtaining food in the wild, including foraging for edible plants and hunting small animals․ Techniques such as trapping, fishing, and insect harvesting are covered, along with guidance on preparing and cooking food safely․ The manual emphasizes identifying poisonous plants and ensuring food safety to avoid illness․ These skills are essential for sustaining energy and health in survival situations, making food procurement a cornerstone of wilderness survival․

7․1․ Foraging for Edible Plants

Foraging for edible plants is a critical survival skill emphasized in the US Army Survival Field Manual․ The manual provides a detailed guide to identifying safe and nutritious plants in various environments, including forests, deserts, and jungles․ It highlights universal edibility tests to determine if a plant is safe to eat, such as touching, smelling, and tasting in small amounts․ The manual also lists common edible plants, such as dandelions, cattails, and berries, and warns against poisonous lookalikes․ Proper identification is stressed to avoid fatal mistakes․ Additionally, the manual advises on how to prepare plants for consumption, such as boiling or drying, to maximize nutritional value․ This section is essential for sustainably sourcing food in the wild, ensuring survival without reliance on modern supplies․ The manual’s visual guides and descriptions make it a invaluable resource for foraging safely and effectively in any ecosystem․

7․2․ Hunting and Trapping

Hunting and trapping are essential survival skills detailed in the US Army Survival Field Manual․ The manual outlines various methods for catching small and large game, including the use of improvised traps like snares, pits, and deadfalls․ It emphasizes the importance of using minimal equipment and maximizing efficiency․ Techniques such as waiting, stalking, and driving game are also covered․ The manual stresses the need to target small game, as it is more abundant and requires less energy to capture․ Proper handling of game, including skinning and cooking, is addressed to ensure safe consumption․ Additionally, the manual highlights ethical considerations, such as avoiding unnecessary killing and using all parts of the animal․ These skills are critical for sustaining oneself in the wild, especially when other food sources are scarce․ The manual’s practical advice makes it a vital resource for effective hunting and trapping in survival situations․

First Aid Basics

The US Army Survival Field Manual emphasizes the importance of basic first aid in survival situations․ It provides detailed guidance on treating injuries, such as wounds, burns, and fractures, with minimal equipment․ Key principles include cleaning and dressing wounds to prevent infection, using tourniquets and hemostatic agents to control bleeding, and applying splints to immobilize broken limbs․ The manual also covers basic pain management and the psychological aspects of caring for the injured․ Proper first aid techniques are crucial for maintaining health and morale in challenging environments․ By following these methods, individuals can stabilize conditions until professional medical help is available․ The manual’s focus on practical, field-expedient solutions makes it an indispensable resource for survival scenarios․ Its clear, step-by-step instructions ensure that even those with limited medical training can provide effective care․ This section is vital for anyone facing survival challenges․

Navigation Skills

The US Army Survival Field Manual provides essential guidance on navigation, emphasizing the importance of knowing one’s position and direction in survival situations․ It teaches how to use natural signs, such as the sun, stars, and landmarks, to determine direction․ The manual also covers the use of a compass and how to create a makeshift one if necessary․ Techniques for navigating without tools, such as following streams or using vegetation patterns, are included․ Additionally, it highlights the importance of staying calm and using available resources to create mental or physical markers․ These skills are crucial for avoiding disorientation and ensuring safe movement․ By mastering navigation techniques, individuals can conserve energy and increase their chances of survival․ The manual’s practical methods make it a vital resource for anyone in a survival scenario․

Signaling Techniques

The US Army Survival Field Manual emphasizes the importance of effective signaling to secure rescue or communication․ It outlines various methods to signal for help, including the use of fires, smoke, mirrors, and flares․ The manual highlights creating visible signals on the ground, such as arranging rocks or branches to form “HELP” or “SOS․” It also discusses the use of whistles, with three short blasts signaling distress․ For nighttime signaling, the manual recommends building fires in a triangle formation or using reflective materials to catch rescuers’ attention․ Additionally, it covers the creation of smoke during the day using green leaves or wet wood to produce thick, visible plumes․ These techniques are designed to maximize visibility and increase the chances of being noticed by rescue teams․ Proper signaling can save time and energy, making it a critical survival skill․

Exploiting Local Resources

The US Army Survival Field Manual stresses the importance of exploiting local resources to sustain life in survival situations․ This includes identifying and utilizing materials for shelter, food, and tools․ The manual provides guidance on how to repurpose natural elements, such as branches, leaves, and snow, to construct shelters or create signaling devices․ It also covers the use of local flora and fauna for sustenance, emphasizing the identification of edible plants and the procurement of animals for food․ Additionally, the manual teaches how to craft essential tools, like spears or traps, using readily available materials․ By leveraging the environment effectively, individuals can conserve energy and resources, increasing their chances of survival․ This section underscores the importance of resourcefulness and adaptability in any survival scenario․

Personal Health and Hygiene

Personal health and hygiene are critical components of survival, as neglecting them can lead to serious health issues․ The US Army Survival Field Manual emphasizes the importance of maintaining cleanliness to prevent infections and diseases․ Individuals are advised to wash hands regularly, especially before handling food, and to keep wounds clean and covered․ The manual also stresses the need to manage bodily waste properly, away from living and water sources, to avoid contamination․ Additionally, it provides guidance on personal grooming, such as trimming nails and managing hair, to reduce the risk of lice and other parasites․ Mental health is also addressed, with tips on maintaining morale and avoiding despair․ By prioritizing health and hygiene, individuals can better withstand the physical and psychological challenges of survival situations․ These practices are essential for sustaining energy and resilience in harsh environments․

Survival at Sea

Survival at sea requires a combination of preparation, knowledge, and the right mindset․ The US Army Survival Field Manual provides detailed guidance on how to stay alive in marine environments․ Key strategies include conserving energy, using available resources like life rafts, and signaling for rescue․ Staying hydrated is crucial, with tips on rationing water and collecting rainwater․ The manual also covers how to identify edible sea life while avoiding dangerous species․ Techniques for navigating by sun, stars, and currents are included, along with methods for constructing makeshift shelters in lifeboats․ Signaling techniques, such as using flares, mirrors, and smoke, are emphasized to increase visibility to rescuers․ The manual stresses the importance of maintaining morale and staying vigilant, as survival at sea often depends on endurance and the ability to adapt to unpredictable conditions․ These strategies are designed to help individuals survive until rescue or reach land safely․

Urban Survival

Urban survival involves navigating the challenges of a city environment, where resources may be scarce but dangers are abundant․ The US Army Survival Field Manual provides practical advice for surviving in urban settings, emphasizing the importance of situational awareness and resourcefulness․ Key strategies include finding or creating safe shelter, securing food and water, and avoiding potential hazards like crowds, collapsed structures, and contaminated supplies․ The manual also covers techniques for signaling for help and navigating through unfamiliar terrain․ It stresses the importance of staying calm and using available materials to improvise tools or protective gear․ Additionally, it addresses the psychological aspects of urban survival, such as maintaining morale and avoiding panic․ By applying these skills, individuals can increase their chances of survival in the midst of urban chaos or disaster scenarios․ The manual serves as a vital resource for both military personnel and civilians facing urban survival challenges․

The US Army Survival Field Manual is a comprehensive guide that equips individuals with the knowledge and skills necessary to survive in diverse environments․ By emphasizing a holistic approach to survival, the manual ensures that readers understand the importance of mindset, resourcefulness, and adaptability․ Whether in the wilderness, urban settings, or at sea, the techniques and strategies outlined in the manual provide a foundation for overcoming adversity․ The principles of finding shelter, procuring water and food, and signaling for help are universally applicable, making this manual an invaluable resource for both military personnel and civilians․ Ultimately, the manual reinforces the idea that survival is not just about physical skills but also about mental resilience and preparedness․ By mastering the techniques described, individuals can confidently face and overcome even the most challenging survival situations․

weslo cadence g 5.9 treadmill owners manual

Welcome to the Weslo Cadence G 5.9 Treadmill Owners Manual. This guide provides essential information for safe assembly, operation, and maintenance of your treadmill. Read carefully to ensure optimal performance and longevity of your equipment.

Overview of the Treadmill Features

The Weslo Cadence G 5.9 treadmill is designed for effective home workouts, featuring 6 Personal Trainer Workouts and 8 preset programs for varied exercise routines. It includes a 2-position manual incline for adjusting intensity and Comfort Cell Cushioning to reduce impact on joints. The built-in pulse sensor allows heart rate monitoring, while the console provides clear workout data. These features make it a versatile and user-friendly option for fitness enthusiasts seeking convenience and efficiency in their training sessions.

Importance of Reading the Manual

Reading the Weslo Cadence G 5.9 treadmill manual is crucial for safe and effective use. It provides detailed instructions for assembly, operation, and maintenance, ensuring proper functionality. The manual highlights safety precautions, such as emergency stop procedures and weight restrictions, to prevent injuries and damage. Additionally, it outlines troubleshooting tips and maintenance guidelines to extend the treadmill’s lifespan. Understanding the manual helps users maximize their workout experience while adhering to warranty conditions and accessing customer support when needed.

Key Features of the Weslo Cadence G 5.9 Treadmill

The Weslo Cadence G 5.9 Treadmill features 6 Personal Trainer Workouts, 2-Position Manual Incline, Comfort Cell Cushioning, Built-In Pulse Sensor, and 8 Preset Workouts for versatile training.

6 Personal Trainer Workouts

The Weslo Cadence G 5.9 Treadmill comes with 6 pre-set Personal Trainer Workouts, offering diverse training options tailored to different fitness goals. These programs incorporate varied inclines and speeds to keep your workouts engaging and effective. Whether you’re aiming for weight loss, endurance, or strength, these workouts provide structure and motivation. Each program adjusts automatically, ensuring a dynamic and challenging exercise experience. This feature makes it easy to stay on track with your fitness journey and achieve desired results efficiently.

2-Position Manual Incline

The Weslo Cadence G 5.9 Treadmill features a 2-position manual incline, offering versatility for your workouts. This incline function allows you to adjust the deck to two different levels, providing varied intensity for walking, jogging, or running. The manual adjustment is simple and convenient, enabling you to customize your workout to target different muscle groups. By incorporating incline training, you can enhance calorie burn, boost endurance, and add variety to your exercise routine, keeping your workouts engaging and effective.

Comfort Cell Cushioning

The Weslo Cadence G 5.9 Treadmill is equipped with Comfort Cell Cushioning, a unique feature designed to reduce the impact on your joints during workouts. This cushioning system absorbs shock and provides a smoother walking or running surface, making your exercise experience more comfortable. By minimizing stress on your joints, it allows for longer and more enjoyable workouts. Additionally, the cushioning helps maintain a consistent belt motion, ensuring a stable and quiet operation. This feature is particularly beneficial for users who prioritize joint health and overall workout comfort.

Built-In Pulse Sensor

The Weslo Cadence G 5.9 Treadmill features a built-in pulse sensor, allowing you to monitor your heart rate during workouts. Located on the handgrips, this sensor provides real-time feedback, helping you stay within your target heart rate zone. This feature is essential for optimizing your exercise routine and ensuring you achieve your fitness goals safely. The pulse sensor is easy to use and offers accurate readings, making it a valuable tool for tracking your cardiovascular progress throughout your training sessions. Regular use can enhance your workout efficiency and overall health.

8 Preset Workouts

The Weslo Cadence G 5.9 Treadmill comes with 8 preset workouts designed to cater to various fitness goals. These programs automatically adjust the treadmill’s speed and incline to provide a diverse and challenging exercise experience. Whether you’re focusing on cardio improvement, weight loss, or endurance building, these workouts offer structured routines to keep your sessions engaging and effective. The preset options eliminate the need for manual adjustments, allowing you to concentrate on your performance and achieve consistent results with every use.

Assembly and Installation

Assembly and installation of the Weslo Cadence G 5.9 Treadmill are straightforward processes that require careful attention to the provided instructions. Ensure all parts are properly aligned and securely tightened using the included tools. Choose a flat, stable surface in a well-ventilated area for optimal performance. Follow the step-by-step guide to avoid errors and ensure safety. Proper installation is crucial for the treadmill’s longevity and your safety during workouts.

Step-by-Step Assembly Instructions

Begin by unpacking all components and verifying the integrity of each part. Locate the frame, deck, and console. Attach the legs to the frame using the provided bolts. Next, align the deck with the frame and secure it tightly. Mount the console on the uprights, ensuring proper connection of all wires. Attach the side rails and handlebars. Tighten all screws and bolts firmly. Double-check all connections for stability and safety. Finally, plug in the power cord and test the treadmill to ensure everything functions correctly before use.

Tools and Equipment Needed

For assembling the Weslo Cadence G 5.9 treadmill, you will need a Phillips screwdriver, a 3/16″ Allen wrench, and a 5mm Allen wrench. Additionally, a rubber mallet may be useful for gently tapping parts into place. Ensure you have a measuring tape to verify proper alignment and a torque wrench for securing bolts. Optional items include gloves for grip and a socket set for added convenience. Always refer to the manual for specific tool requirements to ensure a safe and accurate assembly process.

Installation Location Recommendations

Place the Weslo Cadence G 5.9 treadmill on a firm, level surface in a well-ventilated area. Avoid direct sunlight to prevent overheating. Ensure the area is clear of obstacles for safe access. Position it near a power outlet and consider using a surge protector; The floor should be sturdy enough to support the treadmill’s weight. If installed upstairs, verify the floor’s weight capacity. Keep the treadmill away from water sources to avoid electrical hazards. Proper placement enhances safety, stability, and performance.

Safety Precautions

Always read the manual before use. Ensure the treadmill is placed on a level surface and follow weight and age restrictions. Keep children away and use the emergency stop feature when needed. Regularly inspect the equipment for damage and avoid overexertion. Proper precautions ensure safe and effective workouts. Adhere to all guidelines to minimize risks and maintain optimal performance.

General Safety Guidelines

Before using the Weslo Cadence G 5.9 treadmill, ensure the area is clear of obstacles and the surface is level. Always inspect the equipment for damage or wear. Supervise children and pets during operation. Wear proper workout attire and avoid loose clothing that may catch. Use the emergency stop feature if needed. Follow weight and age restrictions. Keep the treadmill unplugged when not in use. Familiarize yourself with controls before starting. Avoid overexertion and consult a doctor if you have health concerns. Proper precautions ensure a safe and effective workout experience.

Emergency Stop Procedures

In case of an emergency, immediately press the red emergency stop button or pull the safety key. This will halt the treadmill belt instantly. Ensure the machine is cool before restarting. Never attempt to stop the belt manually. If the emergency stop is activated, unplug the treadmill and wait 30 seconds before restarting. Always stay calm and follow these steps to ensure your safety. Familiarize yourself with the emergency stop feature before use to prevent accidents. Proper use of these procedures is crucial for safe operation.

Weight and Age Restrictions

The Weslo Cadence G 5.9 treadmill has a maximum weight capacity of 250 lbs (113 kg). Users must be at least 12 years old to operate the treadmill safely. Children under 12 should not use the treadmill, even with supervision. Exceeding the weight limit may cause damage or void the warranty. Always ensure users meet these requirements to maintain safety and optimal performance. Adhere to these guidelines to prevent accidents and prolong the lifespan of your treadmill.

Operating the Treadmill

Plug in the treadmill, press the start button, and select your desired mode or preset workout. Adjust speed and incline as needed for a comfortable exercise experience.

How to Turn On the Power

To power on the Weslo Cadence G 5.9 treadmill, locate the power switch, usually found near the console or under the hood. Ensure the treadmill is properly plugged into a grounded electrical outlet. Flip the switch to the “on” position and press the start button on the console. The display will light up, and the treadmill is ready for use. Always ensure the area is clear and follow safety guidelines before beginning your workout.

Using Manual Mode

Manual mode allows you to control the treadmill settings directly. Press the “Manual” button on the console to activate this mode. Use the speed and incline buttons to adjust the treadmill’s settings during your workout. The console will display your current speed, incline, and other metrics. You can increase or decrease the intensity at any time by pressing the corresponding buttons. This mode provides flexibility and customization, letting you tailor your workout to your preferences. Always start at a low intensity and gradually increase as needed.

Selecting Preset Workouts

The Weslo Cadence G 5.9 treadmill offers 8 preset workouts designed to provide variety and challenge. To select a preset workout, navigate to the workout section on the console and choose your desired program using the arrow buttons. Each preset workout automatically adjusts the treadmill’s speed and incline to guide you through a structured routine. Once selected, press the “Start” button to begin. You can monitor your progress on the display and adjust settings as needed during the workout for optimal results. This feature helps keep your workouts engaging and effective.

Adjusting the Incline

To adjust the incline on the Weslo Cadence G 5.9 treadmill, use the manual incline feature. The treadmill offers two preset incline positions, allowing you to simulate walking or running uphill. To change the incline, ensure the treadmill is stopped and locate the incline adjustment mechanism. Move the lever or button to your desired position. Always adjust the incline before starting your workout or when the belt is stationary to ensure safety. This feature enhances workout intensity and targets different muscle groups effectively.

Maintenance and Troubleshooting

Regular maintenance ensures your Weslo Cadence G 5.9 treadmill runs smoothly. Clean the belt, check for wear, and lubricate as needed to prevent friction issues. Troubleshooting common problems like belt misalignment or sensor malfunctions can be addressed by referring to the manual or contacting customer support for assistance.

Belt Lubrication Recommendations

Regular belt lubrication is crucial for smooth operation. The Weslo Cadence G 5.9 treadmill typically doesn’t require frequent lubrication, but if you notice friction or noise, apply a silicone-based lubricant. Avoid household oils, as they may damage the belt or deck. Lubricate every 3 months or as needed. Ensure the treadmill is turned off and unplugged before applying lubricant. Wipe off excess with a clean cloth to prevent residue buildup. Proper lubrication extends the lifespan of the belt and motor, ensuring optimal performance during workouts.

Cleaning and Upkeep Tips

Regular cleaning is essential for maintaining the Weslo Cadence G 5.9 treadmill. Use a soft cloth and mild detergent to wipe down the console, belt, and surrounding areas after each use. Avoid harsh chemicals, as they may damage the surfaces. Vacuum dust from the motor vents to ensure proper airflow. Dampen a cloth with water to clean the belt, but avoid excessive moisture to prevent rust. Regularly inspect and tighten loose bolts or screws. Proper upkeep ensures optimal performance, safety, and longevity of your treadmill.

Common Issues and Solutions

If the belt stalls or skips, check for debris and ensure proper lubrication. For error messages, unplug the treadmill, wait 30 seconds, and restart. If the power fails, verify the outlet connection and circuit breaker. Heart rate sensors may malfunction if not placed correctly on the handlebars. Address these issues promptly to maintain functionality and safety. Always refer to the manual for troubleshooting steps before contacting support. Regular maintenance can prevent many common problems, ensuring smooth operation and extending the treadmill’s lifespan.

Warranty and Support

The Weslo Cadence G 5.9 treadmill comes with a warranty covering parts and labor. For details, refer to the manual. Contact customer support for assistance or inquiries.

Warranty Details

The Weslo Cadence G 5.9 treadmill is backed by a comprehensive warranty program. The frame is typically covered for 10 years, while the motor and parts are covered for 1 year. Labor costs are usually covered for 1 year as well. To activate the warranty, ensure proper registration of your product. Refer to the manual for specific terms and conditions. Regular maintenance, as outlined in the manual, is essential to maintain warranty validity. Contact customer support for any warranty-related inquiries or claims.

Customer Support Contact Information

For any inquiries or assistance with your Weslo Cadence G 5.9 treadmill, contact customer support directly. Support is available via phone, email, or through the official website. Visit the manufacturer’s website for the most up-to-date contact information. Live chat support is also available on their official site. Refer to the manual for additional details on how to reach customer service. Ensure to have your product serial number ready for faster assistance. Visit www.officialwebsite.com for more information.

Downloading the Manual

Visit the official Weslo website to download the Cadence G 5.9 treadmill manual in PDF format. Access the manual instantly for free at www.officialwebsite.com.

Official Sources for the Manual

The official Weslo Cadence G 5.9 treadmill manual can be downloaded directly from Weslo’s authorized website or trusted retailer sites. Visit www.officialwebsite.com to access the PDF version free of charge. Ensure you verify the source to avoid unauthorized downloads. The manual is also available through select online marketplaces like Amazon, where it can be downloaded instantly after purchase. Always choose reputable platforms to ensure authenticity and safety.

How to Access the PDF Version

To access the Weslo Cadence G 5.9 treadmill manual in PDF format, visit the official Weslo website or authorized retailers like Amazon. Use the model number (Cadence G 5.9) to search for the manual. Some sites may require creating an account or verifying ownership. Once found, click the download link to save the PDF. Ensure the source is reputable to avoid unauthorized versions. The manual is also available through select online marketplaces, where it can be downloaded instantly after purchase. Always verify the source for authenticity.

Final Tips for Effective Use

For optimal performance, always start with a proper warm-up and cool-down. Use the built-in pulse sensor to monitor your heart rate during workouts. Take advantage of the 6 Personal Trainer Workouts and 8 preset programs to diversify your routines. Adjust the 2-position manual incline to challenge yourself gradually. Keep the treadmill clean and lubricate the belt as needed. Store it in a dry, cool place when not in use. Refer to the manual for specific guidance tailored to your fitness goals.

Benefits of Regular Maintenance

Regular maintenance ensures optimal performance and extends the lifespan of your Weslo Cadence G 5.9 treadmill. Proper lubrication prevents belt friction, reducing wear and tear. Cleaning the treadmill regularly keeps it hygienic and functioning smoothly. By following maintenance guidelines, you avoid unexpected breakdowns and ensure safety during workouts. A well-maintained treadmill provides consistent performance, supporting your fitness journey effectively. Regular upkeep also maintains warranty validity, protecting your investment. Consistent care ensures your treadmill remains a reliable tool for achieving your health and fitness goals.

hyundai elantra 2018 owner’s manual

Welcome to the 2018 Hyundai Elantra Owners Manual, your comprehensive guide to understanding and maintaining your vehicle․ This manual covers key features, safety tips, maintenance schedules, and troubleshooting to ensure optimal performance and longevity of your car․ By following the guidelines outlined, you can enhance your driving experience, improve fuel efficiency, and keep your Elantra in top condition for years to come․

Overview of the Manual’s Purpose and Structure

The 2018 Hyundai Elantra Owners Manual is designed to provide owners with a clear understanding of their vehicle’s features, operation, and maintenance requirements․ The manual is structured to guide users through essential information, ensuring safe and efficient driving․ It begins with an introduction to the vehicle’s key components, followed by detailed sections on safety features, maintenance schedules, and troubleshooting common issues․ The manual also includes technical specifications and warranty details, offering a comprehensive resource for optimizing performance and longevity; Each section is organized logically, making it easy for drivers to navigate and find relevant information quickly․ This guide is tailored to help owners maximize their driving experience while adhering to recommended practices․

Key Features of the 2018 Hyundai Elantra

The 2018 Hyundai Elantra boasts a range of innovative features designed to enhance performance, comfort, and safety․ It offers a choice of efficient engines, including a 2․0L inline-4 cylinder and a 1․4L Turbo GDI, delivering balanced power and fuel efficiency․ The Elantra features advanced safety technologies such as Forward Collision Avoidance, Lane Keeping Assist, and Blind Spot Monitoring․ Inside, the cabin is equipped with a user-friendly infotainment system, featuring a touchscreen display, Apple CarPlay, and Android Auto compatibility․ Additional highlights include heated and ventilated seats, a premium audio system, and a spacious interior․ These features make the 2018 Elantra a versatile and technologically advanced compact car․

Safety Features and Precautions

The 2018 Hyundai Elantra is equipped with advanced safety features, including Forward Collision Avoidance and Blind Spot Monitoring, to enhance driver and passenger protection․ Adhering to manual guidelines ensures safe vehicle operation and optimal performance․

Important Safety Information for Drivers

The 2018 Hyundai Elantra is designed with safety in mind, featuring advanced systems like Forward Collision Avoidance and Blind Spot Monitoring․ Drivers must familiarize themselves with these features to ensure optimal functionality․ Adhering to the manual’s guidelines, such as proper seatbelt use and avoiding vehicle modifications, is crucial for maintaining safety standards․ Regular maintenance, as outlined in the manual, helps prevent issues like engine knocking or oil consumption, which can compromise safety․ Ignoring these precautions may lead to reduced performance or increased risk of accidents․ Always refer to the manual for specific instructions on safety protocols and system operations․

Vehicle Modifications and Compliance

Modifying your 2018 Hyundai Elantra may void its warranty or compromise safety․ Always consult the manual before making changes․ Unauthorized alterations can affect performance and compliance with safety standards․ Hyundai recommends adhering to factory specifications to ensure reliability and maintain warranty coverage․ Any modifications should be approved by Hyundai or performed by authorized dealers to meet safety and regulatory requirements․ Failure to comply may result in reduced vehicle performance or legal issues․ Always prioritize manufacturer guidelines to preserve your car’s integrity and safety features․ Unauthorized changes can lead to system malfunctions or increased risk of accidents, so consult professionals before altering your vehicle․

Maintenance and Service Schedule

Regular maintenance is essential for your 2018 Hyundai Elantra․ Follow the manual’s guidelines for oil changes, tire pressure checks, and inspections․ Schedule services at authorized dealers to ensure optimal performance and warranty compliance․

Recommended Maintenance Intervals

Regular maintenance is crucial for the longevity and performance of your 2018 Hyundai Elantra․ The owner’s manual outlines specific intervals for routine services․ Oil changes are recommended every 5,000 to 7,500 miles, depending on driving conditions․ Tire pressure should be checked monthly and before long trips, with rotations scheduled every 7,500 miles․ Inspections of belts, hoses, and brakes are advised at 15,000-mile intervals․ Fluid checks, including coolant and transmission fluid, should occur every 30,000 miles․ Additionally, spark plugs should be replaced at 105,000 miles, and the timing belt at 100,000 miles․ Adhering to these intervals ensures optimal performance, prevents major repairs, and maintains warranty compliance․ Always consult your manual for exact schedules tailored to your vehicle․

Oil Change and Fluid Requirements

Your 2018 Hyundai Elantra requires regular oil changes to maintain engine health․ The recommended oil type is 5W-30, as specified in the owner’s manual․ Oil changes should be performed every 5,000 to 7,500 miles, depending on driving conditions․ The manual also emphasizes using ethylene glycol-based coolant to ensure proper engine cooling․ Brake fluid and transmission fluid levels should be checked every 15,000 miles, with replacements as needed․ Using approved fluids is crucial to prevent damage and maintain warranty coverage․ Always refer to the manual for specific guidelines on fluid capacities and types to ensure optimal performance and longevity of your vehicle․

Tire Pressure and Wheel Maintenance

Proper tire pressure is essential for optimal performance, safety, and fuel efficiency․ Check tire pressure monthly and before long trips, using the recommended levels found in the owner’s manual or on the tire information label․ Under-inflated tires can lead to reduced handling, increased wear, and lower fuel economy․ Inspect tires regularly for signs of uneven wear, damage, or punctures․ Rotate tires every 7,500 miles to ensure even wear․ Ensure wheels are tightened properly after tire changes․ Misaligned wheels can cause pulling or uneven tire wear․ Always follow the manual’s guidelines for maintaining your Elantra’s tires and wheels to ensure reliability and prevent potential issues․

Common Issues and Troubleshooting

The 2018 Hyundai Elantra may experience issues like engine knocking and oil consumption․ Regularly check the PCV valve and oil levels to prevent these problems․ Consult the manual for detailed troubleshooting steps to address common concerns effectively and maintain your vehicle’s performance․ Always refer to the manual for guidance on resolving issues promptly and safely․

Addressing Engine Knocking and Oil Consumption

Engine knocking and excessive oil consumption are common issues in the 2018 Hyundai Elantra․ These problems often arise from low-quality oil, incorrect viscosity, or a faulty PCV valve․ Regular oil changes with the recommended 5W-20 or 5W-30 are crucial․ If knocking persists, inspect the engine’s components and ensure proper maintenance․ Excessive oil use may indicate worn piston rings or cylinder walls․ Always refer to the manual for guidance on addressing these issues promptly to prevent further damage․ Additionally, using synthetic oil can help reduce wear and tear, ensuring the engine runs smoothly for years to come․

Improving Fuel Efficiency and Performance

To enhance fuel efficiency and performance in your 2018 Hyundai Elantra, maintain proper tire pressure, as under-inflated tires reduce MPG․ Use the recommended 5W-20 or 5W-30 oil for optimal engine performance․ Avoid aggressive driving, such as rapid acceleration, as it lowers fuel economy․ Regularly service your vehicle, including cleaning or replacing the air filter, to ensure the engine runs efficiently․ Additionally, remove extra weight from the trunk to improve aerodynamics and reduce fuel consumption․ Proper maintenance, such as timely spark plug replacements, also contributes to better performance․ By following these tips, you can maximize your Elantra’s fuel efficiency and overall driving experience․

Infotainment and Technology

The 2018 Hyundai Elantra features an advanced infotainment system with a 7-inch touchscreen, Bluetooth connectivity, and smartphone integration․ Higher trims include navigation and voice command functionality for enhanced convenience․

Understanding the Infotainment System

The 2018 Hyundai Elantra’s infotainment system is designed for ease of use and connectivity․ The 7-inch touchscreen display allows you to access features like Bluetooth, USB ports, and smartphone integration․ Higher trims include navigation, voice commands, and additional apps for enhanced functionality․ The system supports both Apple CarPlay and Android Auto, enabling seamless smartphone integration․ Drivers can control music, calls, and navigation directly from the steering wheel or touchscreen․ The interface is intuitive, with clear menus and responsive controls․ Regular software updates ensure optimal performance and compatibility with the latest devices․ This system enhances convenience and entertainment, making every drive more enjoyable and connected․

Navigation and Bluetooth Connectivity

The 2018 Hyundai Elantra’s infotainment system offers advanced navigation and Bluetooth connectivity for a seamless driving experience․ The navigation system provides turn-by-turn directions with real-time traffic updates, ensuring efficient route planning․ Bluetooth connectivity allows for hands-free calls and wireless audio streaming, enhancing safety and convenience․ The system supports voice commands for navigation and phone functions, reducing distractions while driving․ Higher trims include additional features like HD Radio and SiriusXM for premium entertainment․ Pairing your smartphone is straightforward, with automatic connection once paired․ For troubleshooting, resetting the system or restarting your phone often resolves connectivity issues․ This integrated technology keeps you connected and informed on the go․

Fuel Efficiency and Performance

The 2018 Hyundai Elantra is designed for optimal fuel efficiency, with EPA-estimated MPG ratings tailored for city and highway driving․ Regular maintenance and smart driving habits maximize performance and MPG․

Optimizing MPG for Better Fuel Economy

To maximize fuel efficiency in your 2018 Hyundai Elantra, adopt smooth driving habits, such as gradual acceleration and avoiding hard braking․ Maintain proper tire pressure as recommended in the owner’s manual, as under-inflated tires can reduce MPG․ Regular maintenance, including oil changes with the correct viscosity and air filter replacements, ensures optimal engine performance․ Remove unnecessary weight from the vehicle, as extra load can decrease fuel economy․ Drive at moderate speeds and use cruise control on highways to maintain consistent speed․ Plan your route to avoid traffic and frequent stops․ By following these tips, you can enhance your Elantra’s fuel efficiency and enjoy better mileage․

Warranty and Service Coverage

The 2018 Hyundai Elantra is backed by a comprehensive warranty program, including a 10-year/100,000-mile powertrain coverage․ Extended protection plans and regular maintenance by authorized dealers ensure longevity and reliability․

Hyundai’s 10-Year/100,000-Mile Warranty

Hyundai’s 10-Year/100,000-Mile Warranty provides extensive coverage for the powertrain, offering peace of mind to Elantra owners․ This warranty covers repairs and replacements of engine, transmission, and drivetrain components․ It applies to the original purchaser and is transferrable to subsequent owners, enhancing resale value․ The warranty demonstrates Hyundai’s commitment to durability and customer satisfaction, ensuring your Elantra remains reliable for years․ Regular maintenance by authorized dealers is recommended to uphold warranty validity․ This program is a testament to Hyundai’s confidence in the quality and longevity of their vehicles․

Extended Protection and Maintenance Plans

For added peace of mind, Hyundai offers optional extended protection and maintenance plans beyond the standard warranty․ These plans provide coverage for repairs and maintenance after the initial warranty period expires, ensuring continued protection for your Elantra․ Extended plans can cover unexpected repairs, parts replacements, and even routine maintenance, helping to reduce out-of-pocket expenses․ These plans are ideal for drivers who plan to keep their vehicle for an extended period or exceed the mileage limit of the standard warranty․

Consult your local Hyundai dealer to explore available options tailored to your needs, ensuring your Elantra remains protected and well-maintained for years to come․

Technical Specifications

The 2018 Hyundai Elantra offers a range of engine options, including a 2․0L MPI and 1․4L Turbo GDI, paired with 6-speed manual or automatic transmissions․ Front-wheel drive is standard, delivering efficient performance and smooth handling․ With a fuel tank capacity of 12-14 gallons, the Elantra is designed for both city and highway driving efficiency․

Engine Options and Performance Details

The 2018 Hyundai Elantra offers two engine options: a 2․0L MPI Atkinson Cycle engine and a 1․4L Turbo GDI engine․ The 2․0L engine delivers 147 horsepower and 132 lb-ft of torque, while the 1․4L Turbo produces 128 horsepower and 156 lb-ft of torque․ Both engines are paired with a 6-speed manual or automatic transmission, ensuring smooth acceleration and fuel efficiency․ The Eco trim with the 1․4L Turbo engine achieves an EPA-estimated 32 MPG city and 40 MPG highway․ Drivers can choose between Normal, Eco, and Sport modes to tailor performance to their preferences․ Proper maintenance, including regular oil changes with 5W-30 oil, is essential for optimal engine performance and longevity․

Transmission and Drive Types

The 2018 Hyundai Elantra features a 6-speed manual transmission as standard, while a 6-speed automatic transmission with SHIFTRONIC® is available for seamless shifting․ The Eco trim includes an EcoShift® dual-clutch transmission for enhanced fuel efficiency․ All models come with front-wheel drive, providing stability and control on various road conditions․ Drivers can choose between Normal, Eco, and Sport modes via the Drive Mode Select system, allowing customization of throttle response and transmission behavior․ Proper transmission fluid checks and maintenance are essential to ensure smooth operation․ The manual transmission requires synthetic 75W-85 GL-4 gear oil, while the automatic transmission uses ATF 3 (Dexron III) fluid for optimal performance․

Final Tips for Maximizing Your Hyundai Elantra Experience

To maximize your 2018 Hyundai Elantra experience, prioritize regular maintenance, including oil changes and tire pressure checks, to ensure optimal performance and fuel efficiency․ Address engine knocking promptly to prevent damage, and consider upgrading to synthetic oil for better engine health․ Explore the infotainment system’s features, such as Bluetooth connectivity, to enhance your driving experience․ Avoid unnecessary modifications to maintain compliance with Hyundai’s standards․ Schedule services with authorized dealers to uphold your warranty and ensure quality repairs․ By following these tips and adhering to the owner’s manual, you can enjoy a safe, efficient, and enjoyable ride for years to come․

suntouch heated floor thermostat manual

The SunTouch Heated Floor Thermostat Manual provides essential guidance for installing and operating your floor heating system. This manual ensures optimal performance, efficiency, and safety. Follow the instructions carefully for a seamless experience.

1.1 What Is the SunTouch Heated Floor Thermostat?

The SunTouch Heated Floor Thermostat is a sophisticated device designed to regulate and control electric floor heating systems efficiently. It ensures optimal temperature management, providing comfort and energy savings. The thermostat is equipped with programmable settings, allowing users to customize heating schedules and preferences. It also features a floor sensor that monitors temperature accurately, preventing overheating and ensuring consistent warmth. Compatibility with smart home systems enhances convenience, enabling remote control and integration with other smart devices. Safety is a priority, with built-in features like GFCI protection to prevent electrical hazards. Available in various models, the SunTouch thermostat caters to different installation needs, offering versatility and reliability. Whether for new constructions or renovations, it is a trusted solution for homeowners seeking efficient and safe floor heating. By combining advanced technology with user-friendly design, the SunTouch Heated Floor Thermostat stands out as a top choice for modern heating solutions.

1.2 Importance of the Manual for Installation and Operation

The SunTouch Heated Floor Thermostat Manual is crucial for the successful installation and operation of your floor heating system; It provides detailed step-by-step instructions, ensuring a safe and correct setup. Without the manual, homeowners risk improper installation, which can lead to system malfunctions, energy inefficiency, or even safety hazards. The manual offers troubleshooting tips and maintenance guidelines, helping users identify and resolve common issues quickly. It also explains how to program the thermostat for optimal performance, including customizing settings and understanding sensor functions. By following the manual, users can maximize the system’s lifespan and efficiency. Additionally, it outlines safety precautions, such as GFCI protection and electrical guidelines, to protect both the user and the system. Adhering to the manual’s instructions ensures a seamless and enjoyable experience with your SunTouch Heated Floor Thermostat.

System Components and Compatibility

The SunTouch Heated Floor System includes components like mats, thermostats, and sensors, ensuring compatibility with various flooring types and smart home systems for efficient and tailored heating solutions.

2.1 Overview of the SunTouch Heated Floor System

The SunTouch Heated Floor System offers a comprehensive solution for radiant floor heating, combining mats, thermostats, and sensors. Designed for efficiency, it provides consistent warmth with minimal energy consumption. The system is versatile, suitable for various spaces, including bathrooms, kitchens, and living areas. It ensures even heat distribution, eliminating cold spots. Compatible with multiple flooring types, it adapts to different home setups. The system includes programmable thermostats, allowing users to customize temperature settings for comfort and energy savings. Safety features, such as GFCI protection, are integrated to prevent electrical hazards. The SunTouch system is also compatible with smart home systems, enabling remote control and advanced scheduling options; This overview highlights the system’s key elements, ensuring users understand its capabilities and benefits for a comfortable and efficient heating experience.

2.2 Compatible Thermostat Models and Features

The SunTouch Heated Floor System supports a range of thermostat models, each designed to meet specific needs. The Command Touch Programmable Thermostat is a popular choice, offering advanced features like programmable settings, floor sensor integration, and compatibility with smart home systems. Another option is the Duo Thermostat, which provides dual-voltage functionality, ideal for larger or more complex installations. These models are equipped with user-friendly interfaces, allowing for precise temperature control and energy-efficient operation. Key features include programmable schedules, floor temperature limits, and GFCI protection for electrical safety. The thermostats are also compatible with various floor heating mats and can be integrated with existing home automation systems. This flexibility ensures that users can customize their heating experience while maintaining reliability and safety. By selecting the right thermostat model, homeowners can optimize their SunTouch Heated Floor System for comfort, efficiency, and long-term performance.

Installation Instructions

Prepare the site, ensuring proper floor and wall readiness; Install conduits for sensors and power leads, following safety guidelines and manufacturer instructions for a secure setup.

3.1 Preparing the Site for Installation

Before installing the SunTouch heated floor system, ensure the site is ready. Clear the area of debris and obstructions. Verify that the subfloor is level, clean, and dry. Check for any electrical connections or plumbing that may interfere with the installation. Insulate the area if necessary to maximize efficiency. Ensure all necessary tools and materials are available, including conduits for sensors and power leads; Refer to the manual for specific requirements regarding floor types and conditions. Proper preparation ensures a smooth installation process and optimal system performance. Follow safety guidelines to avoid potential hazards. This step is crucial for the longevity and effectiveness of your heated floor system.

3.2 Step-by-Step Installation Guide

Begin by laying out the SunTouch heating mat according to the floor’s dimensions. Secure the mat with adhesive tape, ensuring it is tightly fitted and evenly spread. Connect the mat’s power leads to the thermostat, following the wiring diagram provided in the manual. Install the floor sensor by placing it in the center of the heated area, ensuring it is not in contact with the heating mat. Route the sensor wire neatly to the thermostat. Mount the thermostat on a wall, preferably near the electrical supply. Connect the thermostat’s wires to the main electrical panel, ensuring all connections are secure and meet local electrical codes. Power up the system and test it by adjusting the thermostat settings. Verify that the system heats evenly and operates quietly. If any issues arise, consult the troubleshooting section of the manual or contact a licensed electrician for assistance.

3.3 Wiring the Thermostat and Floor Heating System

Wiring the SunTouch heated floor thermostat and heating system requires careful attention to detail to ensure safety and functionality. Begin by connecting the thermostat to the electrical supply, following the wiring diagram provided in the manual. The thermostat typically connects to the heating mat’s power leads and the floor sensor. Ensure that the floor sensor is properly connected to monitor the temperature accurately. Match the wires according to the diagram, paying attention to the voltage specifications—120V or 240V—and ensure all connections are secure. Avoid loose wires and double-check the connections before powering up the system. Mount the thermostat in an accessible, safe location, away from water and potential hazards. Follow local electrical codes and consider consulting a licensed electrician if unsure. After completing the wiring, test the system at a low setting to verify even heating and proper operation. Always refer to the manual for specific guidance and safety precautions.

3.4 Testing the System Post-Installation

After completing the installation, thoroughly test the SunTouch heated floor system to ensure proper functionality. Begin by turning off the power at the circuit breaker and verifying that the system is de-energized. Once safe, turn the power back on and set the thermostat to a low temperature to test the heating mat. Listen for a faint click sound, indicating the system is operational. Check that heat distributes evenly across the floor and that the thermostat accurately regulates the temperature. Test the floor sensor to ensure it provides correct readings and adjust settings if necessary. Verify that the GFCI protection is functioning by pressing the “Test” button on the thermostat or circuit breaker. Inspect all electrical connections for tightness and ensure no wires are loose. Finally, monitor the system for at least 24 hours to identify any potential issues. Address any malfunctions promptly to prevent damage or inefficiency;

Thermostat Features and Programming

The SunTouch thermostat offers programmable settings, allowing customization of heating schedules. It includes a floor sensor to maintain desired temperatures and is compatible with smart home systems for enhanced control and efficiency.

4.1 Programmable Settings and Customization

The SunTouch thermostat allows users to set custom heating schedules, ensuring your floor is warm exactly when you need it. With programmable settings, you can adjust temperatures for different times of the day, optimizing comfort and energy use. The thermostat supports up to four daily settings, providing flexibility for varying routines. Customization options include setting specific temperatures for weekends versus weekdays, enabling tailored heat control. Additionally, the thermostat features a manual override function, allowing temporary adjustments without altering the programmed schedule. These settings can be easily managed through the thermostat’s intuitive interface, ensuring a user-friendly experience. By personalizing your heating preferences, you can enhance efficiency and convenience, making the SunTouch system a versatile solution for your radiant floor heating needs.

4.2 Understanding the Floor Sensor and Its Role

The floor sensor is a critical component of the SunTouch heated floor system, playing a vital role in maintaining optimal temperatures and ensuring safety. It continuously monitors the floor’s temperature and relays this information to the thermostat. This data allows the thermostat to adjust heating output accordingly, preventing overheating and ensuring consistent warmth. The sensor is typically installed under the flooring and connects directly to the thermostat. Its accuracy is essential for the system’s performance, as it helps maintain comfort and energy efficiency. Regular checks should be performed to ensure the sensor is functioning correctly and free from damage. Proper installation and positioning are key to its effectiveness. The floor sensor also enhances safety by automatically shutting off the system if it detects excessively high temperatures, protecting both the flooring and the space from potential damage. This feature ensures a reliable and safe heating experience for users.

4.3 Compatibility with Smart Home Systems

The SunTouch heated floor thermostat is designed to integrate seamlessly with smart home systems, offering enhanced convenience and control. Compatibility with popular platforms like Apple HomeKit, Google Home, and Amazon Alexa allows users to manage their floor heating systems through voice commands or smartphone apps. This integration enables remote monitoring and adjustments, ensuring optimal comfort and energy efficiency. Additionally, smart home compatibility allows for advanced scheduling and energy management features, such as learning your heating preferences over time. The thermostat can also be incorporated into custom scenes and routines, enhancing your overall smart home experience. For installation, ensure your system is compatible with your smart home hub and follows the manufacturer’s guidelines for a smooth setup. Regular updates to the system’s software are recommended to maintain optimal performance and compatibility. This feature-rich integration makes the SunTouch thermostat a versatile choice for modern, connected homes.

Maintenance and Troubleshooting

Regularly inspect wiring and sensors to ensure proper function. Address common issues like no heat by checking circuit breakers or resetting the thermostat. Maintain system efficiency with periodic checks.

5.1 Regular Maintenance Tips for Longevity

Regular maintenance ensures the SunTouch system runs efficiently and lasts longer. Check the thermostat’s settings and wiring annually. Clean or replace floor sensors as needed to maintain accuracy. Insulate well to prevent heat loss. Keep the floor clear of debris and avoid using harsh chemicals. Ensure GFCI protection is functioning properly. Test the system seasonally to identify issues early. Refer to the manual for specific maintenance schedules. Proper care extends system lifespan and performance, ensuring consistent warmth and energy efficiency.

5.2 Common Issues and Solutions

Common issues with the SunTouch system include GFCI trips, uneven heating, or thermostat malfunctions. If the GFCI trips frequently, check for ground faults or electrical interference. Ensure the system is properly grounded and avoid nearby interference sources. For uneven heating, verify mat installation and thermostat settings. If the thermostat fails to heat, check connections and ensure the floor sensor is functioning. Reset the thermostat if necessary. Addressing these issues promptly prevents system damage. Regular testing and maintenance can help identify problems early. Consulting the manual or contacting support is recommended for persistent issues. Proper troubleshooting ensures optimal performance and longevity of the system. Always follow safety guidelines when resolving issues to avoid further complications.

Safety Precautions and Guidelines

Always disconnect power before installing or servicing the system. Use GFCI protection to prevent electrical hazards. Avoid exposing the thermostat to water or excessive heat. Ensure proper grounding to prevent shocks.

6.1 Electrical Safety and GFCI Protection

Electrical safety is paramount when installing and operating the SunTouch Heated Floor Thermostat. Always ensure the system is properly grounded to prevent shocks. Use a Ground Fault Circuit Interrupter (GFCI) to protect against electrical hazards, as it detects and interrupts ground faults, preventing severe electrical accidents. Before starting any installation or maintenance, disconnect the power supply to avoid live wire risks. Never expose the thermostat or heating elements to water, as this can lead to short circuits or electrical fires. Keep the system away from flammable materials. Regularly inspect wires and connections for damage or wear. If you notice any issues, turn off the power immediately and contact a licensed electrician. Adhering to these guidelines ensures a safe and reliable operation of your SunTouch Heated Floor System.

6.2 Avoiding Nuisance Trips and Electrical Interference

To prevent nuisance trips and electrical interference with your SunTouch Heated Floor Thermostat, ensure proper installation and grounding. Keep the thermostat and heating elements away from sources of electrical interference, such as motors or fluorescent lighting. Avoid routing wires near high-voltage appliances, as this can cause false triggers. Use high-quality, shielded cables for connections to minimize interference. If the system is connected to a GFCI outlet, ensure no other high-current devices share the same circuit, as this can cause unnecessary trips. Regularly inspect the system for loose connections or damaged wires, which can also lead to intermittent issues. If nuisance trips persist, consult a licensed electrician to identify and resolve the root cause. Proper installation and maintenance will help ensure reliable operation and minimize electrical interference.

The SunTouch Heated Floor Thermostat Manual provides comprehensive guidance for optimal system performance. For further assistance, visit the official SunTouch website or consult certified professionals for specialized support.

7.1 Summary of Key Points

The SunTouch Heated Floor Thermostat Manual offers a detailed guide for installation, operation, and maintenance of your floor heating system. Key points include proper site preparation, step-by-step installation, and wiring instructions. Programmable settings and sensor functionality ensure efficient temperature control. Regular maintenance, such as cleaning sensors and checking wiring, is crucial for longevity. Troubleshooting common issues like GFCI trips and electrical interference helps resolve problems quickly. Always follow safety guidelines to avoid hazards. Refer to additional resources like the official SunTouch website or certified professionals for further assistance. By adhering to the manual, you can enjoy a reliable and energy-efficient heated floor system. Remember to test the system post-installation and understand compatibility with smart home systems for enhanced convenience. This manual is your go-to resource for a seamless and safe heated flooring experience.

wk61 manual change light

The WK61 manual provides a comprehensive guide to understanding and customizing your keyboard. It covers essential features like RGB lighting, key switches, and maintenance tips. Designed for both beginners and experienced users, the manual ensures optimal performance and personalization of your WK61 keyboard.

1.1 Overview of the WK61 Keyboard

The WK61 is a versatile 75% wireless mechanical keyboard designed for both productivity and gaming. It features RGB backlighting, hot-swappable switches, and tri-mode connectivity (wired, 2.4GHz, and Bluetooth). The keyboard is known for its compact layout, aluminum frame, and customizable keycaps. With QMK/VIA support, users can personalize lighting effects and key mappings. Its ergonomic design and customizable switches make it ideal for users seeking a tailored typing experience. The WK61 also supports seamless switching between devices, making it a flexible option for various setups.

1.2 Importance of Understanding the Manual

Understanding the WK61 manual is crucial for optimizing keyboard performance and personalizing your experience. It provides detailed insights into RGB lighting customization, switch customization, and troubleshooting common issues. The manual ensures users can safely modify components like lighting and switches, preventing potential damage. By following the guide, users can unlock advanced features, resolve connectivity problems, and maintain their keyboard’s longevity. Whether you’re a beginner or an experienced user, the manual serves as an essential resource for maximizing functionality and enjoying a tailored typing experience.

Understanding the Lighting System

The WK61 lighting system features RGB backlighting with customizable effects like breathing, wave, and static modes. It allows users to personalize their keyboard’s visual appeal and enhance gaming experiences.

2.1 Types of Lighting Available

The WK61 offers various lighting options, including static RGB backlighting, breathing effects, and wave patterns. Users can choose from 16 million color combinations, ensuring a personalized experience. The keyboard also features customizable lighting zones, allowing for tailored illumination of specific key groups. Additionally, the lighting can be synchronized with other devices for a unified aesthetic. These features make the WK61 versatile for both functional and decorative lighting preferences, catering to different user needs and environments.

2.2 RGB Backlighting Features

The WK61 keyboard features a vibrant RGB backlighting system, offering 16 million color options. Users can enjoy dynamic lighting effects such as breathing, wave, and ripple patterns. The backlighting is customizable, allowing for personalized illumination of individual keys or key groups. The RGB system supports synchronization with other devices for a cohesive visual experience. With adjustable brightness and color intensity, the WK61 ensures both functional and aesthetic lighting solutions, enhancing typing experiences in various environments. These features make the keyboard stand out for its versatility and visual appeal.

2.3 Customization Options

The WK61 offers extensive customization options for its lighting system, allowing users to tailor their experience. Through software or keyboard shortcuts, users can adjust brightness, select from preset lighting effects, or create unique profiles. Custom keycap designs and switch upgrades further enhance personalization, enabling a tailored typing experience. These features empower users to adapt their keyboard to suit their preferences, ensuring both functionality and style. The WK61’s customization options make it a versatile choice for enthusiasts seeking a personalized setup.

Preparing for the Light Change

Prepare by gathering tools, understanding the keyboard layout, and researching the lighting system. Backup settings and organize workspace to ensure a smooth and efficient process.

3.1 Tools and Materials Needed

To change the lighting on your WK61 keyboard, gather essential tools: a screwdriver, keycap puller, switch removal tool, and soldering iron. Ensure you have replacement lights, wire strippers, and electrical tape. Use an anti-static wrist strap to prevent damage. Organize your workspace with cable ties and a magnifying glass for precision; Keep a multimeter handy for testing connections. Finally, prepare cleaning supplies to maintain your keyboard’s condition during the process. These tools will help ensure a safe and efficient lighting modification.

3.2 Safety Precautions

Before modifying your WK61 keyboard, ensure a safe working environment. Disconnect the keyboard from power sources to avoid electrical shocks. Use an anti-static wrist strap to prevent static discharge, which can damage components. Handle soldering irons with care to avoid burns. Keep flammable materials away and work in a well-ventilated area. Avoid touching sensitive electronic parts to prevent damage. Use protective eyewear when handling small components. Ensure your workspace is clean and stable to prevent accidents. Never rush through the process, as this can lead to errors or injuries.

Step-by-Step Guide to Changing the Light

This section provides a detailed, step-by-step process for replacing or upgrading the lighting system in your WK61 keyboard. Follow carefully for optimal results.

  1. Disconnect the keyboard from power sources to ensure safety.
  2. Access the lighting system by removing the necessary components.
  3. Remove the old light component gently to avoid damage.
  4. Install the new light component securely in its place.
  5. Reassemble the keyboard and test the lighting system.

By following these steps, you can successfully change the light and enjoy your customized WK61 keyboard.

4.1 Accessing the Lighting System

To access the lighting system, start by disconnecting the keyboard from all power sources. Gently remove the keycaps using a keycap puller to expose the switches and lighting components.

  1. Locate the screws at the bottom of the keyboard and remove them to access the PCB.
  2. Carefully lift the PCB to reveal the lighting module and its connections.
  3. Disconnect the lighting cables from the PCB to prevent damage during the process.

Ensure all components are handled with care to avoid damage. Proceed with caution when accessing the lighting system to maintain the keyboard’s functionality.

4.2 Removing the Old Light Component

To remove the old light component, ensure the keyboard is disconnected from power. Use a screwdriver to carefully release any retaining clips or screws holding the LED strip in place. Gently pry the strip away from the keyboard casing, taking care not to damage the surrounding components.

  1. Disconnect the LED strip from the PCB by carefully lifting the connector.
  2. Desolder any wires connecting the old light component to the circuit board.
  3. Remove the component and set it aside for replacement.

Handle the components with care to avoid damage. Ensure all connections are fully detached before removing the old light component to prepare for installing the new one.

4.3 Installing the New Light Component

Install the new light component by aligning it with the designated area on the PCB. Secure it using the provided screws or clips. Solder the wires to the PCB, ensuring proper polarity. Reconnect the LED strip to the keyboard’s circuitry and test the lighting to confirm functionality. Follow the manual’s wiring diagram for accurate connections.

  • Align the LED strip with the mounting points.
  • Solder wires securely to prevent loose connections.
  • Reconnect the strip and test the lighting system.

Ensure all connections are secure to avoid malfunctions. Use the keyboard’s software to verify and customize the lighting effects after installation.

4.4 Reassembling the Keyboard

Reassemble the keyboard by carefully placing the PCB back into its original position. Reattach the plate and secure it with screws. Replace the keycaps and ensure all switches are properly aligned. Tighten the case screws firmly but avoid overtightening. Reconnect any external cables and test the keyboard to confirm all functions, including lighting, are working correctly. Make sure no debris or tools are left inside the keyboard before finalizing the assembly.

  • Align the PCB with the case mounting points.
  • Reattach the plate and secure with screws.
  • Replace keycaps and test functionality.

Verify all connections are secure and test the lighting system before final use.

Customizing the Lighting Effects

Customize lighting effects using RGB software to create unique profiles. Adjust color transitions, brightness, and synchronization for a personalized experience. Explore various pre-set modes or design your own.

5.1 Using Software for RGB Customization

Utilize dedicated software to tailor RGB lighting effects on your WK61 keyboard. Popular tools like QMK or VIA allow you to tweak color schemes, brightness, and synchronization. Create dynamic patterns or static backlighting to match your preferences. Experiment with pre-set modes or design custom profiles for a unique aesthetic. These programs often feature user-friendly interfaces, enabling seamless adjustments. By leveraging software, you can unlock the full potential of your keyboard’s lighting system, enhancing both functionality and visual appeal for a personalized typing experience.

5.2 Creating Unique Lighting Profiles

Design personalized lighting profiles to reflect your style. Combine RGB colors, effects, and timing to craft distinctive setups. Sync lighting with music, games, or ambient conditions for immersive experiences. Use software to layer effects, ensuring each key or zone has a unique flair. Share or import profiles from the community, exploring endless possibilities. Tailor lighting to enhance productivity or aesthetics, making your WK61 truly one-of-a-kind. This customization empowers users to express creativity and enjoy a keyboard that adapts to their preferences and surroundings seamlessly.

Troubleshooting Common Issues

Address lighting malfunctions, connectivity problems, and software glitches. Reset the keyboard, update firmware, or check connections to resolve issues promptly and ensure optimal functionality.

6.1 Diagnosing Lighting Problems

Identify issues like dim or uneven lighting, flickering, or RGB malfunction. Check connections, ensure firmware updates, and verify LED functionality. Consult the manual for specific diagnostic steps to pinpoint the cause of lighting issues effectively. This ensures quick resolution and maintains your WK61’s performance and aesthetic appeal. Regular checks prevent minor problems from escalating, keeping your keyboard in optimal condition.

6.2 Resolving Connectivity Issues

Troubleshoot wireless or wired connections by restarting the keyboard and device. Ensure Bluetooth or 2.4GHz dongle is properly paired. Check battery levels for wireless modes. Update firmware to resolve latency or disconnection issues. Verify no physical obstructions interfere with signals. Reset connections by re-pairing the devices. If issues persist, consult the manual for advanced troubleshooting steps. Ensuring stable connectivity enhances your WK61’s performance for both gaming and productivity. Regular checks help maintain seamless functionality across all modes.

Maintenance and Care

Regularly clean the keyboard with compressed air and a microfiber cloth to prevent dust buildup. Avoid harsh chemicals and ensure the lighting system remains dry for optimal performance.

7.1 Cleaning the Lighting System

To maintain optimal lighting performance, gently clean the WK61’s lighting system with compressed air and a microfiber cloth. Avoid harsh chemicals or liquids, as they may damage the RGB components. Regularly dusting prevents buildup and ensures vibrant backlighting. Always power off the keyboard before cleaning to protect the electrical components. For stubborn dust, use short bursts of compressed air, holding the can upright. Wipe the lighting diffusers with a dry cloth to maintain clarity and brightness. This routine preserves the aesthetic and functionality of your WK61’s lighting system.

7.2 Preventing Dust Buildup

To prevent dust buildup in your WK61 keyboard, regularly clean between the keys using compressed air. Store the keyboard in a dry, dust-free environment when not in use. Avoid eating or drinking nearby to minimize debris accumulation. Consider using a keyboard cover to shield the lighting system from dust particles. Additionally, gently wipe the surface with a microfiber cloth weekly to maintain cleanliness. These proactive steps ensure your WK61’s lighting system remains efficient and visually striking over time.

Advanced Customization Techniques

Explore advanced techniques like upgrading to custom keycaps and experimenting with different switches. These modifications enhance both the sound and tactile feedback of your WK61 keyboard.

8.1 Upgrading to Custom Keycaps

Upgrading to custom keycaps enhances both aesthetics and functionality. Choose from various profiles and materials to match your typing style. Installation is straightforward, requiring keycap pullers. Ensure compatibility with WK61’s layout for seamless integration. Custom keycaps can drastically change the sound, from thocky to creamy, offering a personalized typing experience. Explore different designs to find the perfect fit for your keyboard, improving comfort and visual appeal.

8.2 Experimenting with Different Switches

Experimenting with different switches transforms your typing experience. Linear, tactile, or clicky switches offer unique feels and sounds. The WK61’s hot-swappable design allows easy switch changes without soldering. Try different types to find your ideal balance of sound and feedback. Switches like Akko CS Silver or Gateron Ink can alter the keyboard’s acoustic profile, creating a thocky or creamy sound. This customization enhances comfort and typing efficiency, making your WK61 truly personalized to your preferences.

Community and Support

Engage with the WK61 community to share ideas and learn from enthusiasts. Online forums and tutorials offer valuable insights and tips for customization and troubleshooting, enhancing your experience.

9.1 Engaging with the WK61 Community

The WK61 community is vibrant and active, offering a wealth of knowledge and support. Join forums and groups where users share tips, mods, and experiences. Participating in discussions can help you discover new customization ideas and troubleshoot issues. Many enthusiasts showcase their setups, providing inspiration for your own keyboard journey. By engaging with the community, you can enhance your understanding and make the most of your WK61 keyboard experience.

9.2 Finding Resources and Tutorials

For detailed guidance on modifying your WK61 keyboard, numerous resources are available online. Official forums, YouTube tutorials, and social media groups offer step-by-step instructions and troubleshooting tips. Websites like Reddit’s r/mechkeyboards and specialized forums provide valuable insights from experienced users. Additionally, manufacturer websites often host PDF manuals and FAQ sections. These resources can help you navigate complex processes like changing lights or customizing keycaps. They also serve as excellent platforms for inspiration and learning from the community.

The WK61 manual provides comprehensive guidance on lighting customization and maintenance. Follow the steps to master RGB adjustments, troubleshoot issues, and ensure long-term performance.

10.1 Summary of Key Points

The WK61 manual offers detailed guidance on modifying and maintaining keyboard lighting. Key topics include understanding RGB customization, troubleshooting common issues, and essential maintenance tips. By following the step-by-step instructions, users can enhance their keyboard’s aesthetic and functionality. Whether you’re a novice or an experienced user, this manual ensures you make the most of your WK61 keyboard’s features while avoiding potential pitfalls. Regular updates and community support further enhance your customization journey, ensuring optimal performance and satisfaction.

10.2 Final Tips for Optimal Performance

Regular maintenance and customization can significantly enhance your WK61 keyboard experience. Always clean the lighting system gently to avoid damage and ensure optimal brightness; Use high-quality components when modifying your keyboard to maintain performance. Experiment with lighting profiles to find your perfect setup without overcomplicating designs. Keep your software updated for the latest features and stability. Finally, store your keyboard in a dry, dust-free environment to prolong its lifespan and ensure consistent functionality over time.

gfta 3 scoring manual pdf

The GFTA-3 is a standardized assessment for evaluating speech sound production in children aged 2 to 21 years. This manual provides detailed guidelines for accurate scoring, including error analysis and dialect-sensitive scoring, ensuring reliable results for clinical and educational decisions.

Overview of the GFTA-3 Test

The GFTA-3 is a standardized assessment designed to evaluate speech sound production skills in children aged 2 to 21 years. It is widely used by speech-language pathologists to identify articulation disorders and monitor progress. The test assesses consonant and vowel production, including substitutions, omissions, and distortions. It also provides age-based normative data for both males and females, ensuring accurate comparisons. The test includes two main sections: Sounds-in-Words and Sounds-in-Sentences, which evaluate articulation in different contexts. With updated error analysis and dialect-sensitive scoring, the GFTA-3 offers a comprehensive tool for clinicians and educators to support speech therapy and educational planning.

Purpose of the Scoring Manual

The GFTA-3 Scoring Manual serves as a comprehensive guide for accurately interpreting test results. Its primary purpose is to provide clear instructions for converting raw scores into standard scores, confidence intervals, and percentiles. Detailed guidelines are included for error analysis, such as substitutions, omissions, and distortions, as well as specific rules for scoring consonant clusters and medial phonemes. The manual ensures consistency and reliability in scoring, enabling professionals to make informed clinical decisions. Additionally, it offers resources for dialect-sensitive scoring and special population adjustments, enhancing the test’s applicability across diverse groups. By standardizing the scoring process, the manual supports effective assessment and intervention planning for children with speech sound disorders.

Key Features of the GFTA-3 Scoring System

The GFTA-3 Scoring System offers several key features designed to enhance accuracy and usability. It provides detailed instructions for converting raw scores into standard scores, confidence intervals, and percentiles, ensuring reliable results. The system includes error analysis for substitutions, omissions, and distortions, as well as specific guidelines for scoring consonant clusters and medial phonemes. Additionally, it incorporates dialect-sensitive scoring to accommodate linguistic variations. Age- and gender-based normative data allow for precise comparisons, while automatic scoring spreadsheets streamline the process. These features collectively ensure that the scoring system is both comprehensive and user-friendly, supporting clinicians in making informed decisions for assessment and intervention.

Administration of the GFTA-3

The GFTA-3 assesses speech sound production in children aged 2 to 21. Preparation involves gathering materials, following step-by-step procedures, and ensuring standardized administration for accurate results.

Preparation for Test Administration

Preparation for administering the GFTA-3 involves ensuring a quiet, distraction-free environment and gathering all necessary materials, such as the test manual, record forms, and audio equipment. Examiners must familiarize themselves with the test procedures and scoring guidelines to ensure accuracy. Prior to testing, review the child’s background information and any relevant medical history. Ensure the child is comfortable and ready for the assessment. Practice sessions may be conducted to acclimate the child to the test format. All materials should be organized, and the examiner should be prepared to follow standardized administration protocols to maintain test validity and reliability. Proper preparation is essential for obtaining accurate and meaningful results.

Materials Required for Administration

The GFTA-3 requires specific materials to ensure accurate and efficient administration. These include the GFTA-3 Test Manual, which provides detailed instructions, and the Record Forms for documenting responses. Additional materials such as audio equipment (e.g., a laptop or CD player) may be needed for auditory stimuli. The scoring manual and standardized scoring guidelines are essential for consistent evaluation. Ensure all materials are organized and readily accessible before testing begins. For digital administration, a reliable internet connection and compatible devices may be required. Familiarize yourself with the materials beforehand to streamline the process and minimize distractions. Having backup materials, such as extra pencils or printed forms, is also recommended. Proper preparation of these materials ensures the test is administered smoothly and effectively.

Step-by-Step Administration Procedures

The administration of the GFTA-3 follows a structured process to ensure consistency and accuracy. Begin by reviewing the test manual to understand the procedures and prepare all necessary materials. Create a quiet, distraction-free environment for the child to ensure optimal focus. Start with the Sounds-in-Words subtest, presenting stimuli clearly and audibly, either through live voice or audio recordings. Guide the child through each item, allowing them to respond without interruption. Record their responses accurately on the provided record form, noting any errors such as substitutions, omissions, or distortions. Proceed systematically through all test items, ensuring the child’s attention is maintained. If a child is unable to produce a sound, mark it as such. Complete the administration in one session to avoid fatigue. Follow the manual’s specific instructions for discontinuing subtests when criteria are met. After administration, double-check the record form for completeness and accuracy before moving on to scoring. This structured approach ensures reliable and valid results.

Scoring the GFTA-3

The GFTA-3 scoring manual provides clear guidelines for evaluating speech sounds, tracking errors, and converting raw scores to standard scores to ensure accurate and reliable results.

Understanding Raw Scores

Raw scores in the GFTA-3 represent the total number of errors made by the child during the assessment, including substitutions, omissions, and distortions of speech sounds. These scores are calculated by tallying each incorrect production of consonants, vowels, and consonant clusters. The manual provides detailed guidelines for identifying and counting these errors, ensuring consistency in scoring. Raw scores serve as the foundation for further analysis, as they are later converted into standard scores to determine the child’s performance relative to normative data. Accurate calculation of raw scores is crucial for reliable results, as they directly impact the interpretation of the child’s articulation abilities. The GFTA-3 scoring manual also offers dialect-sensitive scoring adjustments, allowing for more accurate assessments across diverse speech patterns.

Converting Raw Scores to Standard Scores

Converting raw scores to standard scores is a critical step in the GFTA-3 assessment process. Standard scores provide a normalized measure of a child’s performance, allowing for comparison to the normative sample. The manual outlines specific tables and procedures for converting raw scores into standard scores, which are derived from the mean and standard deviation of the normative data. Age- and gender-based norms are used to ensure accurate comparisons, with separate tables provided for males and females. Confidence intervals and percentiles are also calculated to provide a range of scores and interpret performance more precisely. This conversion process ensures that clinicians can interpret articulation abilities reliably, taking into account individual differences and developmental expectations. The GFTA-3 scoring manual also includes dialect-sensitive adjustments to enhance the accuracy of standard score interpretation for diverse populations.

Error Analysis: Substitutions, Omissions, and Distortions

Error analysis in the GFTA-3 involves identifying and categorizing speech errors into substitutions, omissions, and distortions. Substitutions occur when a child replaces one sound with another, while omissions involve the deletion of a sound. Distortions refer to incorrect productions of sounds. Each type of error is scored and counted toward the Total Raw Score. The manual provides detailed criteria for distinguishing these errors, ensuring consistent scoring. For example, substitutions are noted when a phoneme is replaced, and omissions are marked when a sound is absent. Distortions are identified based on how closely the production resembles the target sound. The GFTA-3 also includes dialect-sensitive guidelines to account for regional or cultural variations in speech. This comprehensive approach allows clinicians to accurately assess articulation skills and identify specific areas of difficulty for targeted intervention.

Scoring Consonant Clusters and Medial Phonemes

Scoring consonant clusters and medial phonemes in the GFTA-3 requires careful attention to specific guidelines. Each consonant within a cluster is evaluated individually, with errors counted separately. Medial phonemes, located in the middle of words, are scored based on their accuracy in production. The manual provides detailed instructions for assessing these sounds, ensuring consistency. For clusters, each consonant’s accuracy is noted, while medial phonemes are evaluated for correct articulation. This approach allows for a precise analysis of a child’s speech patterns, aiding in the identification of specific strengths and weaknesses. The GFTA-3 also offers age-based norms for these sounds, enabling accurate comparisons and informed clinical decisions. This section is crucial for obtaining a comprehensive understanding of articulation skills in various word positions.

Interpretation of GFTA-3 Results

Accurate interpretation involves analyzing standard scores, confidence intervals, and percentiles to determine a child’s speech sound production relative to peers. This aids in identifying strengths and areas needing intervention, ensuring targeted support based on comprehensive data. The manual provides clear guidelines for understanding and applying these results effectively in clinical and educational settings, offering a reliable foundation for informed decision-making and developing tailored strategies for improvement.

Understanding Normative Data

The GFTA-3 normative data provides a comparative benchmark for assessing children’s speech sound production. This data, collected from a diverse sample of individuals aged 2 to 21 years, allows examiners to evaluate a child’s performance relative to their peers. By referencing these norms, professionals can determine if a child’s articulation skills fall within typical ranges or if they may indicate a speech disorder. The manual offers detailed age- and gender-specific norms, ensuring accurate and fair assessment. Understanding normative data is crucial for interpreting standard scores, identifying developmental delays, and making informed clinical decisions. This section guides users in effectively utilizing normative data to support diagnosis and intervention planning, enhancing the reliability and validity of assessment outcomes.

Confidence Intervals and Percentiles

The GFTA-3 scoring manual includes confidence intervals and percentiles to enhance the interpretation of test results. Confidence intervals provide a range of scores, reflecting the reliability of the child’s performance, while percentiles indicate how a child’s scores compare to those of their peers. These metrics are derived from the normative data and are age- and gender-specific, ensuring precise and fair comparisons. For example, a percentile rank of 50 means the child scored better than 50% of the normative sample. Confidence intervals help reduce the impact of single-test performance variability, offering a more comprehensive view of a child’s abilities; By interpreting these statistics, professionals can make more accurate diagnoses and develop targeted interventions. This section explains how to apply these metrics effectively, ensuring reliable and meaningful assessment outcomes.

Clinical Implications of Scoring Results

The GFTA-3 scoring results have significant clinical implications for diagnosing and treating speech sound disorders. Accurate scoring helps professionals identify specific error patterns, such as substitutions, omissions, and distortions, which are critical for targeted interventions. Standard scores allow comparisons to age- and gender-based norms, aiding in determining whether a child’s speech skills are within typical ranges or require further assessment. Clinicians can use these results to develop individualized education plans (IEPs) or therapy goals, addressing deficits in articulation, vowel production, or consonant clusters. Additionally, dialect-sensitive scoring ensures culturally responsive assessments, reducing potential biases. By interpreting these results, professionals can monitor progress over time, evaluate the effectiveness of interventions, and make informed decisions for supporting children’s communication development. This section emphasizes the practical applications of scoring for improving clinical outcomes.

Age and Gender-Based Scoring Differences

The GFTA-3 incorporates age- and gender-based norms to ensure accurate and fair scoring. Standard scores are provided separately for males and females, reflecting differences in speech development. These norms account for variations in articulation mastery across age groups, from 2 to 21 years. For example, consonant cluster production and vowel accuracy improve with age, and the manual adjusts scoring accordingly. Age-specific tables, such as Table B.1, outline standard scores, confidence intervals, and percentiles for raw scores. This ensures that clinicians can compare a child’s performance to peers of the same age and gender. Such differentiation supports precise diagnosis and tracking of progress over time, making the assessment more sensitive to individual developmental patterns. This feature is particularly useful for identifying delays or advancements in speech skills relative to peers.

Digital and Print Resources for GFTA-3

The GFTA-3 offers versatile resources, including online scoring tools, printable forms, and automatic spreadsheets. These aids streamline test administration, scoring, and interpretation, enhancing efficiency for clinicians and educators.

Online Scoring Tools and Manuals

The GFTA-3 provides convenient online tools for efficient scoring. These include digital manuals, automated calculators, and downloadable PDF guides. Clinicians can access these resources to streamline test administration and scoring, ensuring accuracy and reducing manual errors. The online platform offers features like score conversion, error analysis, and data management, making it easier to interpret results. Additionally, printable forms and automatic spreadsheets are available for offline use, catering to different preferences and workflows. These resources are designed to support professionals in assessing speech sound production effectively, with clear instructions and updated guidelines to ensure reliable outcomes.

Printable Scoring Forms and Guides

Printable scoring forms and guides for the GFTA-3 are essential for efficient test administration and scoring. These materials include detailed protocols for recording responses, calculating raw scores, and interpreting results. Available in PDF format, the forms provide structured spaces for documenting errors such as substitutions, omissions, and distortions. Guides offer step-by-step instructions for converting raw scores to standard scores, including confidence intervals and percentiles. Additionally, printable resources cover specific scoring rules for consonant clusters and medial phonemes, ensuring accuracy. These materials are particularly useful for professionals who prefer manual scoring or need backup options when digital tools are unavailable. They are designed to complement online resources, offering flexibility and reliability in the scoring process.

Automatic Scoring Spreadsheets

Automatic scoring spreadsheets for the GFTA-3 simplify the scoring process, reducing manual calculations and potential errors. These spreadsheets, often available as downloadable resources, are designed to automate raw score conversion to standard scores, confidence intervals, and percentiles. They include pre-programmed formulas to handle complex scoring rules, such as error analysis for substitutions, omissions, and distortions. Additionally, they can process scoring for consonant clusters and medial phonemes with precision. Users can input raw data directly, and the spreadsheet generates results instantly. This tool is particularly useful for clinicians and educators who administer the test frequently, as it saves time and enhances scoring accuracy. The spreadsheets are typically compatible with popular platforms like Excel and are accessible through official GFTA-3 resources or authorized distributors, ensuring reliability and convenience.

Additional Considerations

The GFTA-3 scoring process requires consideration of cultural background, dialect variations, and specific testing conditions to ensure accurate and fair assessment outcomes for all individuals.

Dialect-Sensitive Scoring Guidelines

The GFTA-3 scoring manual includes dialect-sensitive guidelines to accommodate regional and cultural variations in speech. These guidelines ensure that speech patterns influenced by dialect are scored accurately and fairly. Examiners are provided with specific instructions for adjusting scores based on common dialectal differences, such as vowel shifts or consonant substitutions. This feature enhances the test’s validity for diverse populations. Resources include tables and examples to guide scorers in identifying and appropriately handling dialect-influenced responses. By accounting for dialectal variations, the GFTA-3 promotes equitable assessment outcomes for all individuals, regardless of their linguistic background. This approach is particularly important for ensuring that scores reflect true articulation abilities rather than differences in dialect.

Special Populations and Scoring Adjustments

The GFTA-3 scoring manual addresses the needs of special populations, such as non-native English speakers, individuals with disabilities, and those from culturally diverse backgrounds. It provides specific adjustments to ensure accurate and fair scoring. For example, dialectal variations and phonological processes common in certain populations are accounted for in the scoring system. The manual also includes guidelines for scoring individuals with articulation disorders, apraxia of speech, and other speech-related conditions. Scorers are instructed to consider the individual’s linguistic background and developmental stage when interpreting results. These adjustments help minimize biases and ensure that scores reflect the individual’s true articulation abilities. The manual emphasizes the importance of clinical judgment and provides examples to guide scorers in making appropriate adjustments for diverse populations. This ensures reliable and valid results for all test-takers.

The GFTA-3 scoring manual is an essential resource for accurate and reliable assessment of speech sound production. It ensures consistent scoring and interpretation, supporting effective clinical decisions and interventions for diverse populations.

Final Tips for Effective Scoring

For accurate GFTA-3 scoring, ensure thorough preparation and familiarization with the manual. Carefully transcribe responses to avoid errors. Use dialect-sensitive guidelines to account for regional variations. Double-check error analysis, including substitutions, omissions, and distortions. Consult normative data to interpret scores accurately. Utilize online tools or spreadsheets for efficient calculation of standard scores. Regularly review updates and resources to stay informed. Practice scoring with sample recordings to improve consistency. Collaborate with colleagues for complex cases. Accurate scoring is crucial for reliable results and effective intervention planning.

Importance of Accurate Scoring for Reliable Results

Accurate scoring is essential for obtaining reliable results from the GFTA-3 assessment. Inaccurate scoring can lead to misleading conclusions about a child’s speech abilities, potentially affecting diagnosis and intervention planning. It is crucial to carefully follow the guidelines in the scoring manual to ensure consistency and reliability. Errors in transcription, error classification, or standard score calculation can significantly impact the validity of the results. Clinicians must pay close attention to dialect-sensitive scoring and special population adjustments to avoid over- or under-identifying speech difficulties. Utilizing resources like the scoring manual, online tools, and automatic spreadsheets can enhance accuracy. By adhering to these principles, professionals can ensure that the GFTA-3 provides a clear and trustworthy picture of a child’s speech sound production skills.